How to Teardown a 3D Model: Workflow, Tools, and Tips
Teardown of 3D models is a critical process for artists, technical directors, and developers who need to dissect, optimize, or repurpose assets for games, film, XR, or design. In my experience, a systematic approach—supported by the right tools—saves time, maintains quality, and unlocks creative flexibility. This article walks through my teardown workflow, compares manual and AI-driven methods, and shares actionable tips for production-ready results. If you need to analyze, optimize, or reuse 3D assets, this guide is for you.
Key takeaways:
- A good teardown workflow accelerates optimization, asset reuse, and troubleshooting.
- AI-powered platforms like Tripo can automate segmentation, retopology, and texturing.
- Manual teardown still has value for custom or complex assets.
- Documenting each step ensures smooth handoff and future reuse.
- Avoid common pitfalls like breaking UVs or losing mesh integrity.
What Is a 3D Model Teardown?
Definition and Purpose
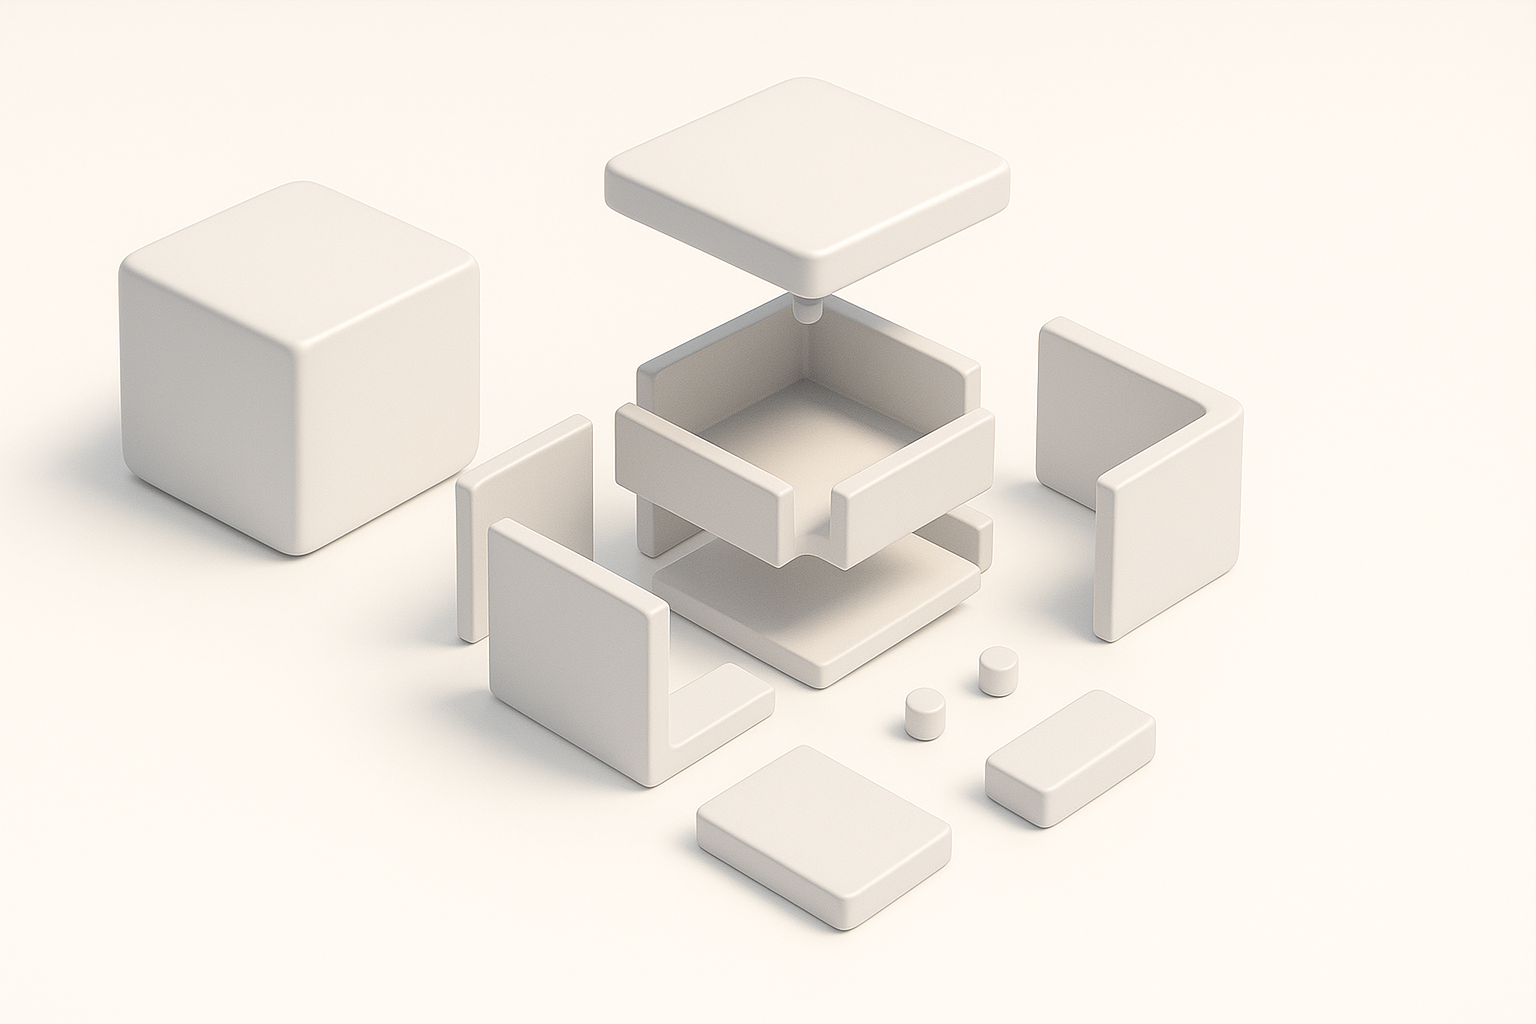
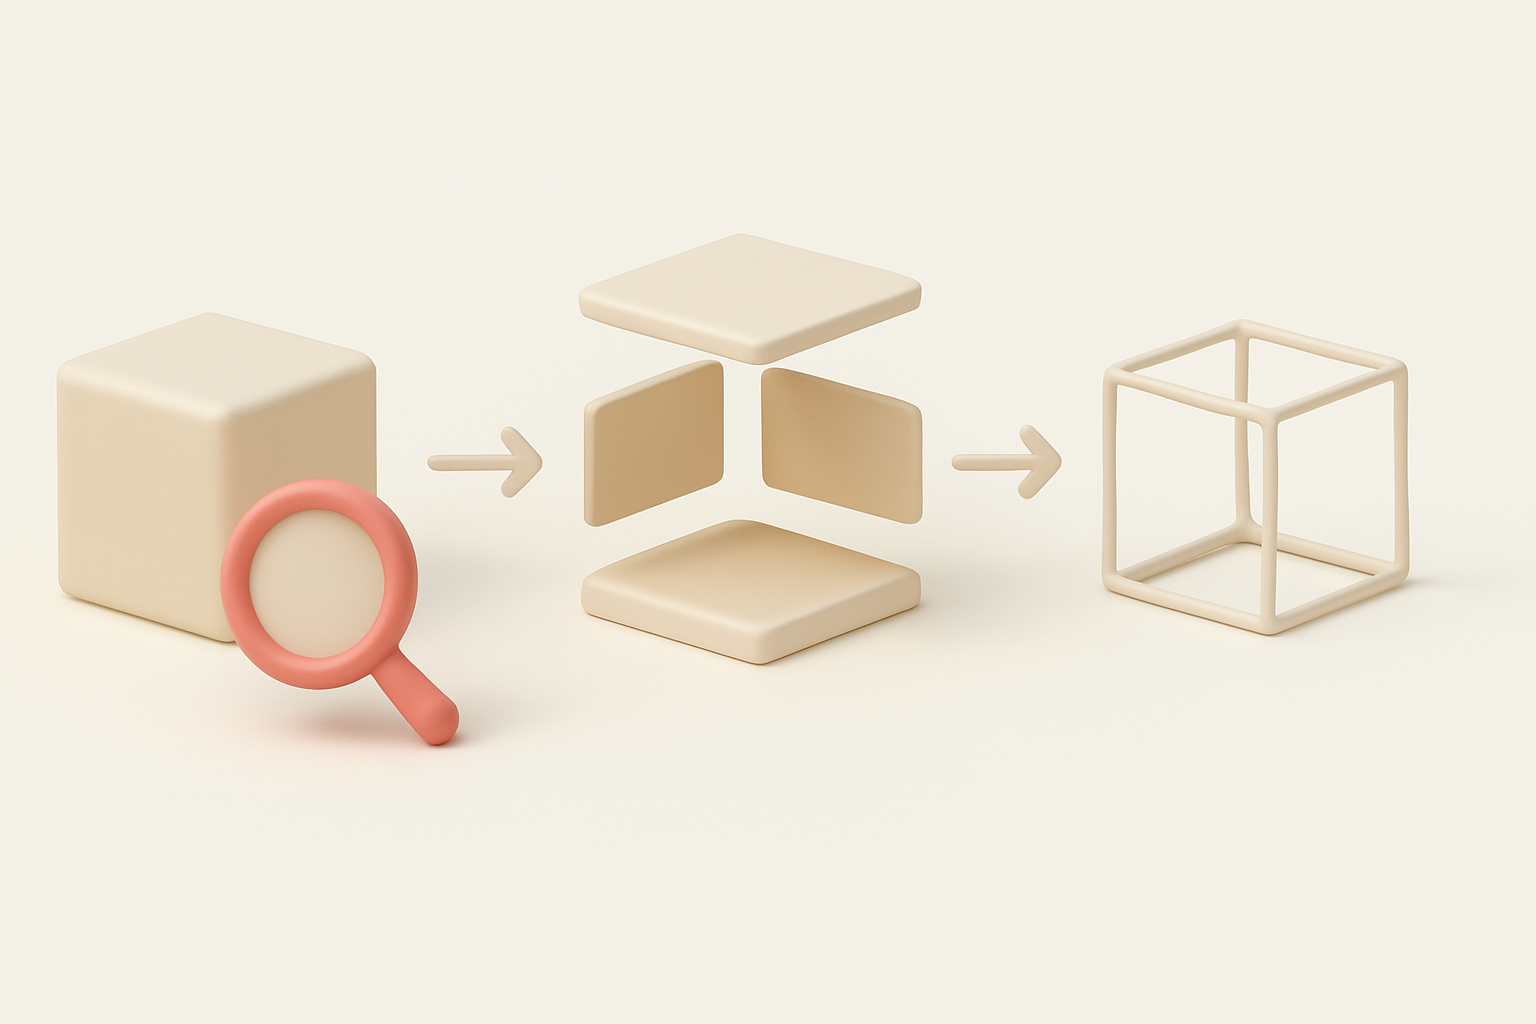
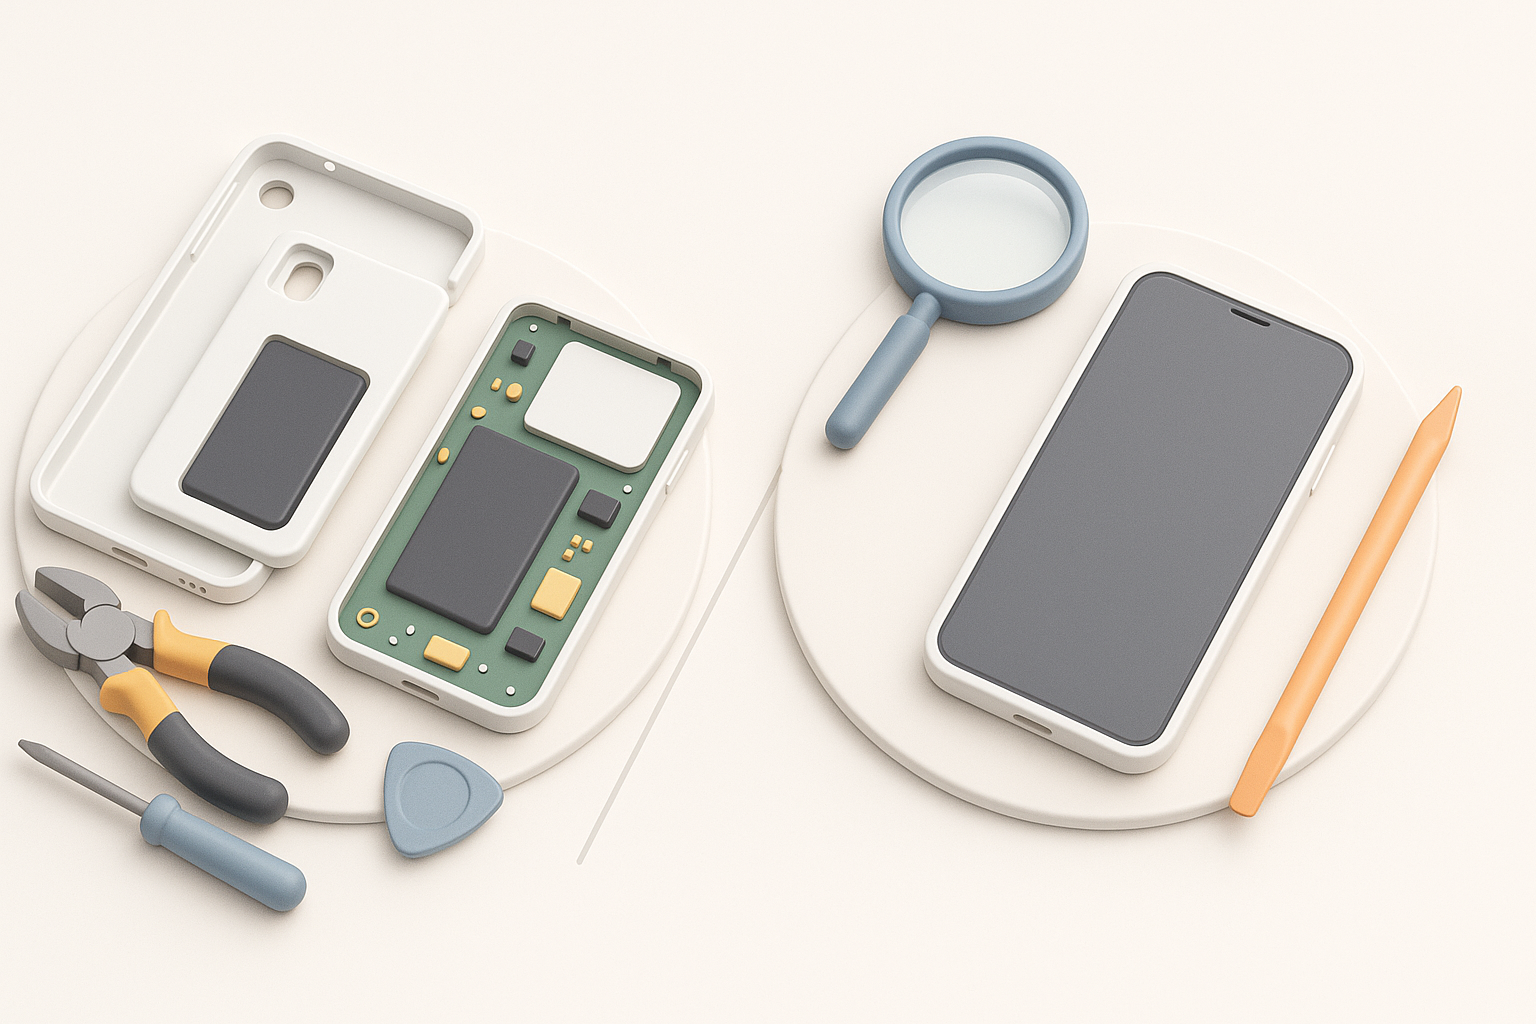
A 3D model teardown is the process of breaking down a model into its core components—geometry, textures, materials, and rigging—so you can analyze, modify, or repurpose it. I use teardowns to understand how assets are built, troubleshoot problems, or prep models for new projects. The goal is always clarity: expose the structure and make improvements where needed.
Common Use Cases in Industry
From my work in gaming and XR, common teardown scenarios include:
- Optimization: Reducing poly count or texture size for real-time engines.
- Asset Reuse: Extracting parts (like props or textures) for new projects.
- Troubleshooting: Diagnosing mesh, rigging, or UV issues.
- Learning: Reverse-engineering models to study techniques or workflows.
My Step-by-Step 3D Model Teardown Workflow
Preparing the Model and Tools
Preparation is everything. Here’s how I set up:
- Backup the original model to avoid accidental data loss.
- Choose the right tools: I use a mix of DCCs (like Blender or Maya) and AI-powered platforms such as Tripo for faster segmentation and retopology.
- Inspect the model: Check for missing textures, naming conventions, and scale.
Checklist:
- Save a copy of the original file
- Gather reference images or documentation
- Confirm tool compatibility (file formats, plugins)
Segmenting, Retopologizing, and Analyzing Components
I break the teardown into three main tasks:
- Segmentation: Using AI tools like Tripo, I quickly isolate logical parts (e.g., limbs, props, clothing). Manual selection works for more nuanced separations.
- Retopology: If the model is dense or messy, I retopologize for cleaner geometry—AI tools can automate this, but manual tweaks may be needed for tricky areas.
- Analysis: I inspect UVs, normals, and textures to identify issues or areas for improvement.
Typical steps:
- Use auto-segmentation to split the mesh by material or part
- Run automated retopology, then manually adjust edge flow if needed
- Export components for further processing or reuse
Best Practices for Efficient 3D Model Teardowns

Maintaining Model Integrity
It’s easy to break things during teardown. I always:
- Work non-destructively (use layers, groups, or duplicates)
- Check mesh integrity after each major operation (look for holes, flipped normals, or UV breaks)
- Validate with quick renders or viewport previews
Tip: Always verify that the model still imports and displays correctly in your target engine after teardown.
Documenting and Reusing Components
Good documentation saves headaches. My process:
- Name and organize parts logically (e.g.,
Helmet_LOD0,Body_UV2) - Store reusable components in a shared library for future projects
- Keep a teardown log: what was changed, why, and any issues found
Mini-checklist:
- Rename all exported parts
- Save annotated screenshots of key steps
- Store textures and materials in organized folders
Comparing Teardown Tools and Methods
AI-Powered Platforms vs. Manual Techniques
AI-driven tools (like Tripo) speed up repetitive tasks—segmentation, retopology, even texture remapping. In my workflow, I use them for:
- Fast initial breakdowns
- Auto-generating clean topology
- Batch processing multiple assets
Manual techniques are better when:
- The model has complex, overlapping parts
- You need precise control over edge flow or UVs
- Custom tweaks are required for stylized assets
When to Use Automated vs. Traditional Workflows
I choose automated workflows for:
- Large batches of similar assets
- Quick turnarounds
- Standardized asset pipelines
I stick to manual methods when:
- Quality or style is critical
- The model is unusually complex or messy
- Automated tools can’t interpret the structure correctly
Lessons Learned and Expert Tips
Common Pitfalls and How I Avoid Them
Over the years, I’ve run into these issues:
- Losing UVs: Always check UVs after retopology—some tools overwrite them.
- Broken rigs: If the model is rigged, test deformations after teardown.
- Naming chaos: Unclear names make asset management a nightmare.
How I avoid them:
- Export intermediate steps
- Use consistent naming conventions
- Double-check in target applications
Optimizing for Production-Ready Results
My best results come from:
- Combining AI automation for speed, with manual refinement for quality
- Validating assets in their final context (game engine, renderer, etc.)
- Keeping teardown assets organized for easy updates or reuse
Pro tips:
- Use Tripo’s batch processing for large projects, but always review outputs
- Document every change for future collaborators
- Test assets early and often in your production pipeline
If you follow a structured teardown workflow and leverage the best tools for your needs, you’ll save time, avoid costly errors, and deliver production-ready 3D assets every time.