How to Make a Plant Cell 3D Model (Step-by-Step School Project Guide)
Need to build a plant cell 3D model for your school project? This guide walks you through every step of the process — from understanding the parts of a plant cell to creating a colorful and scientifically accurate 3D model that's sure to stand out in class.
🧬 What Is a Plant Cell?
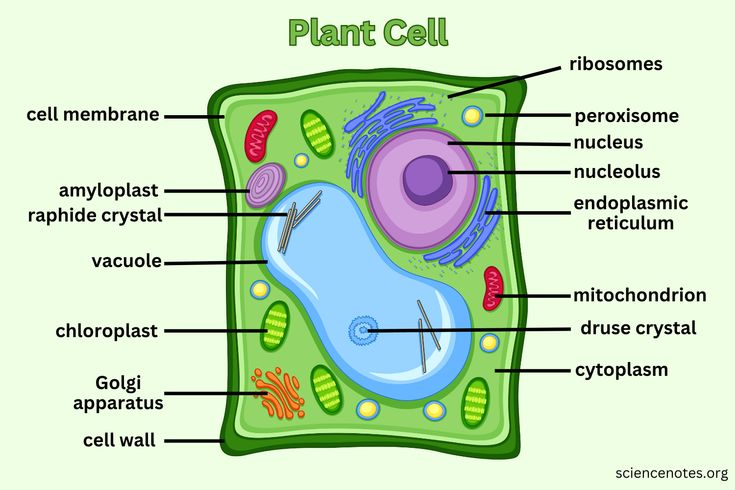
Plant cells are the building blocks of plants and are distinct from animal cells in several ways. They have a rigid cell wall, chloroplasts for photosynthesis, and a large central vacuole, among other features.
Here are the key components to include in your model:
🎨 Materials for a Plant Cell 3D Model
Here are some easy-to-find materials to build your model:
- Shoebox or shallow cardboard box (for the cell wall shape)
- Modeling clay or Play-Doh (in various colors)
- Foam balls, beads, pipe cleaners, pasta (for organelles)
- Toothpicks + paper (for labeling parts)
- Hot glue or school glue
- Paint and markers (optional)
🛠 How to Make a Plant Cell 3D Model: Step-by-Step
Step 1: Prepare the Cell Base
Use a shoebox or rectangular tray to represent the cell wall (plant cells have a rigid box-like shape).
Step 2: Fill with Cytoplasm
Spread a thin layer of modeling clay inside the base to represent the cytoplasm, the jelly-like interior.
Step 3: Add the Organelles
Use different shapes and colors of clay or household items:
- Nucleus: Large ball, placed off-center; add a smaller nucleolus inside
- Chloroplasts: Oval shapes with inner stacks (use green)
- Vacuole: Big oval or bean-shaped structure, usually centrally located
- Mitochondria: Bean-like pieces with squiggles
- ER (smooth and rough): Long tubes, near the nucleus (add “dots” for ribosomes on rough ER)
- Golgi Apparatus: Series of folded layers or stacked ovals
- Ribosomes: Tiny beads or dots
- Plasmodesmata: Dotted lines or small slits near the cell wall
Step 4: Label Each Part
Create small paper flags and attach them with toothpicks to label each organelle. Neat, readable labels help teachers assess your model.
Step 5: Add Finishing Touches
Check your layout, reinforce fragile parts with glue, and take photos for your project report if needed.
🧠 Project Tips for a Top Grade
- Be Accurate: Make sure your organelles are correctly shaped and positioned.
- Stay Neat: Clean construction and clear labels go a long way.
- Use Color Wisely: Choose distinct colors for each organelle to avoid confusion.
- Include a Key/Legend: This helps viewers quickly understand your model.
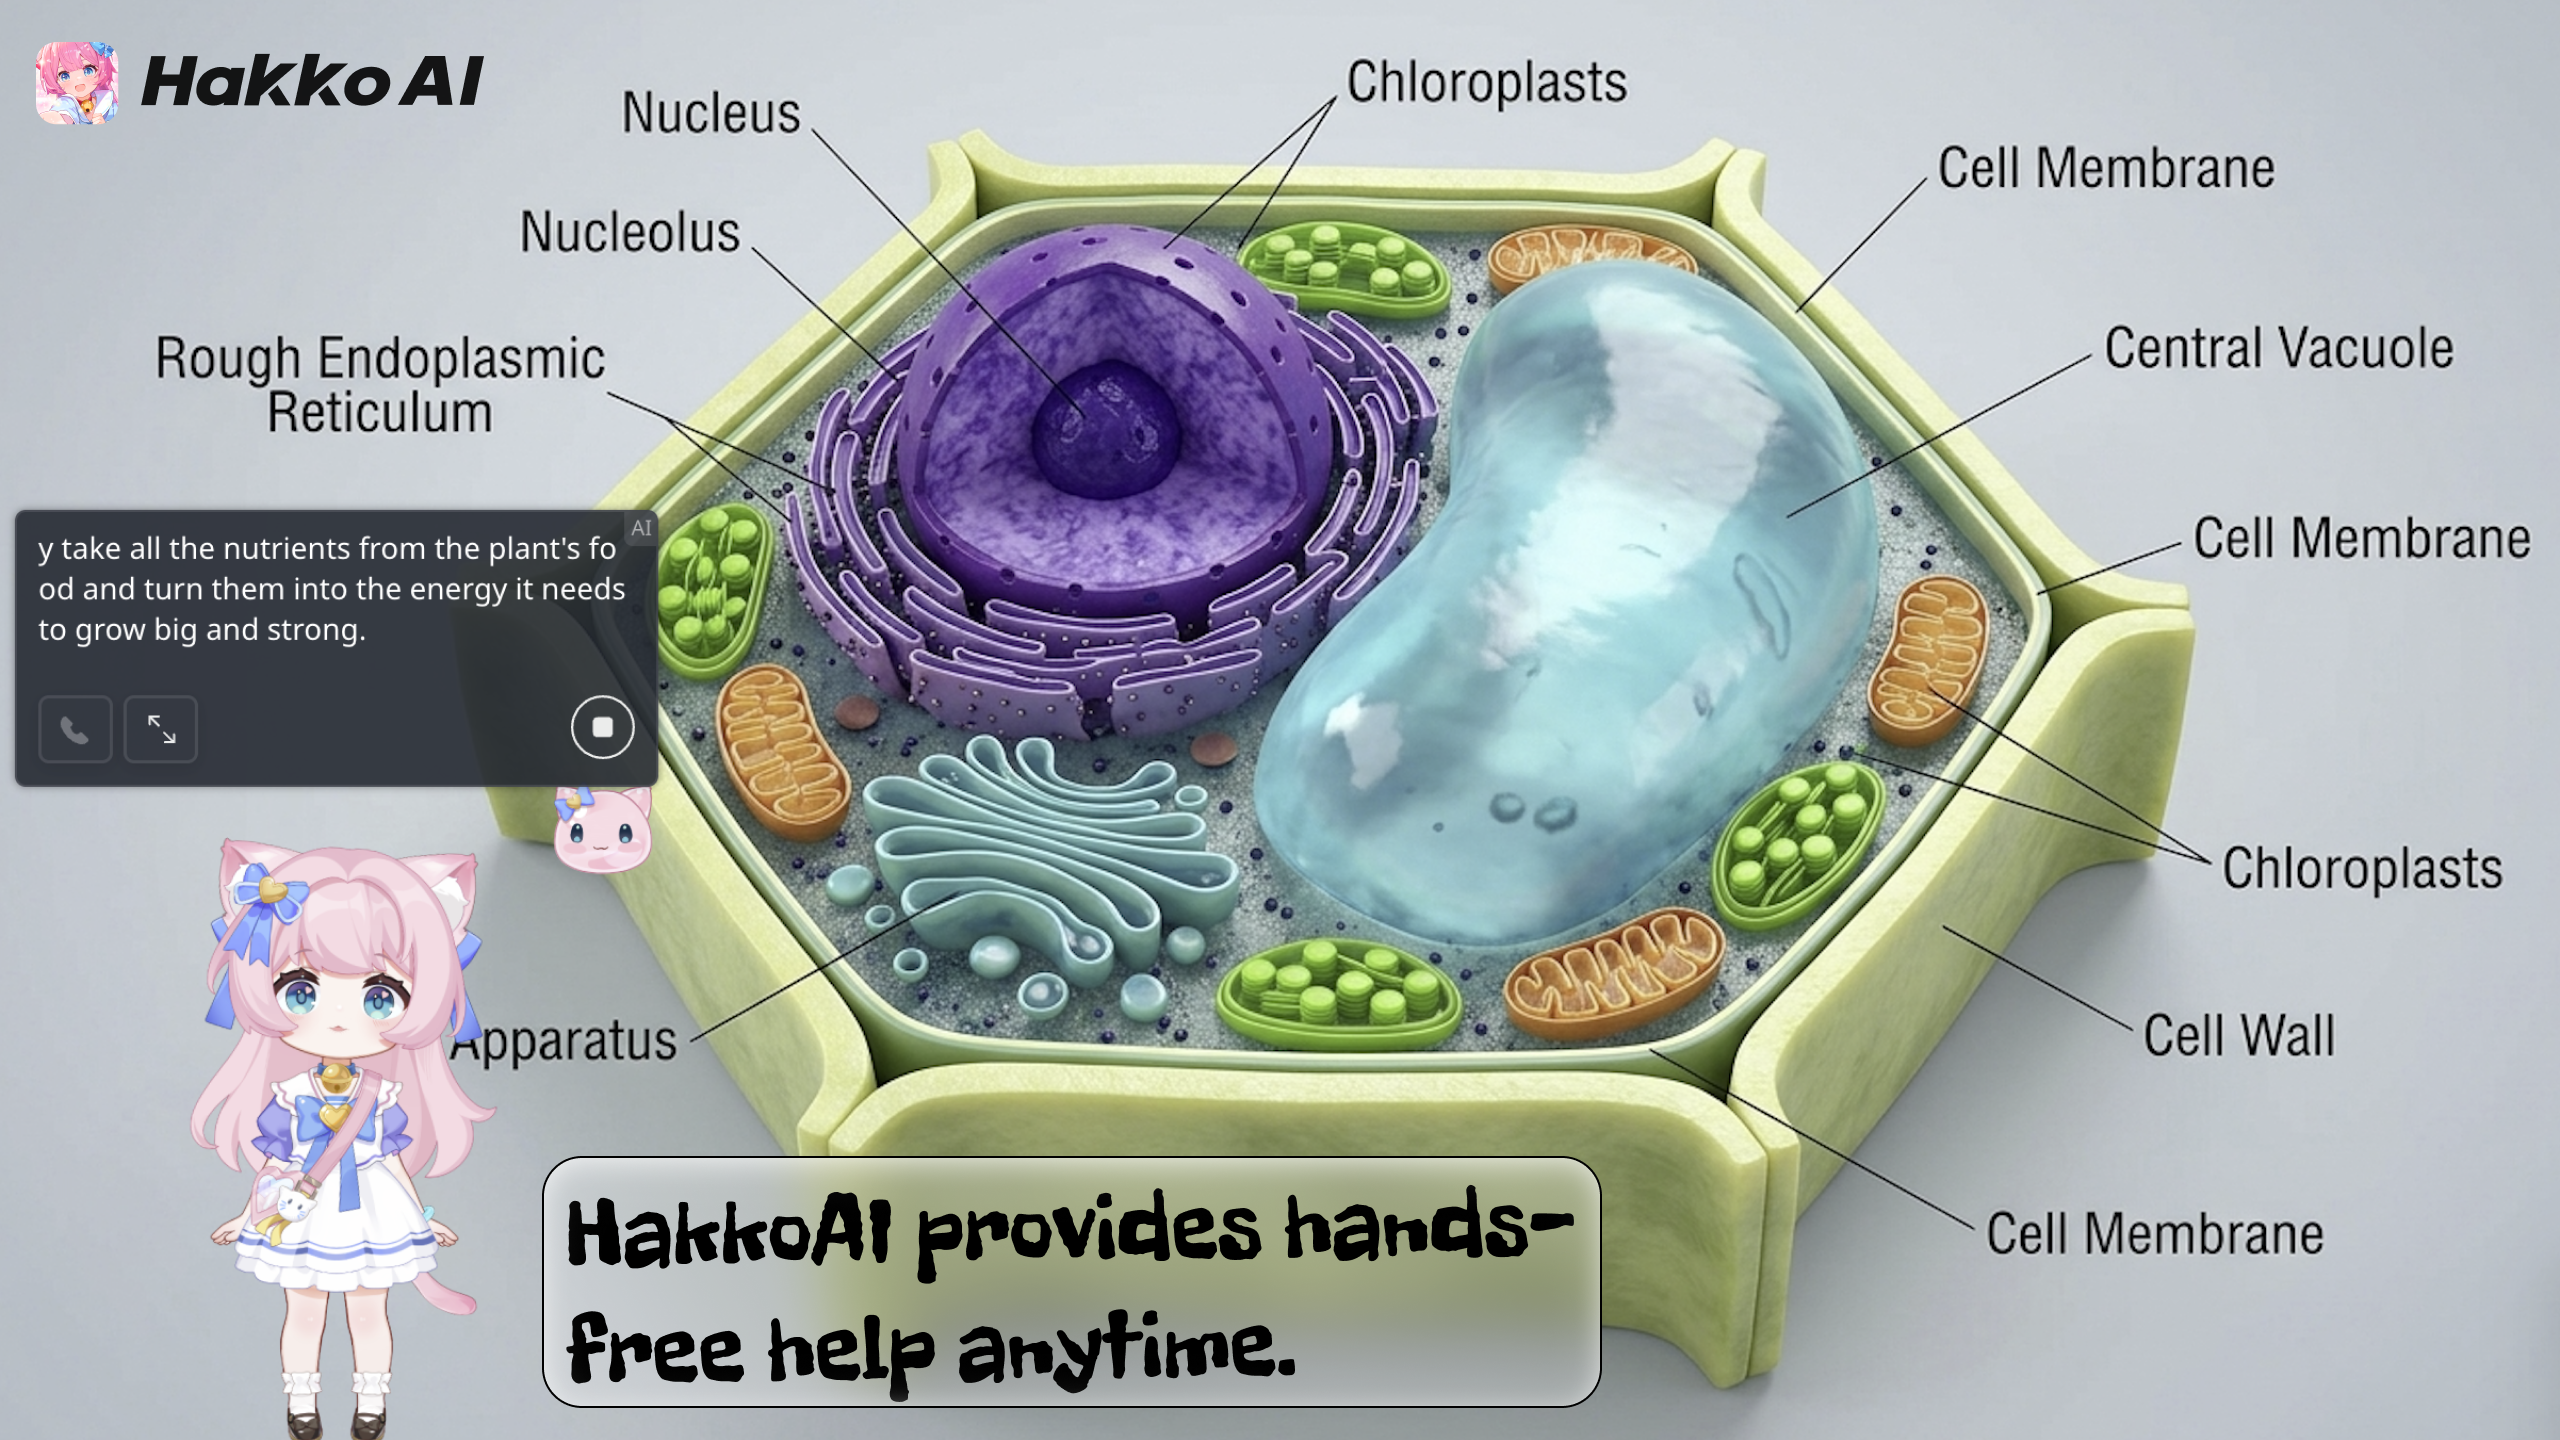
🏆 Extra Tip for a Higher Score: Let HakkoAI Support You Before, During, and After 3D Model Creation
Unlock creative inspiration and rigorous project evaluation anytime. When constructing a 3D plant cell model or tackling any school project, students can utilize HakkoAI on their PC for immediate, hands-free assistance. Designed to eliminate the need for switching screens or interrupting the creative workflow, students can simply speak aloud to receive instant answers. From structuring design approaches and explaining complex cell functions to organizing presentation scripts and cross-checking models against critical knowledge rubrics, HakkoAI serves as an always-on academic mentor that handles follow-up inquiries effortlessly.
HakkoAI is far more than a basic Q&A tool—it’s an advanced AI companion that sees your screen, hears your voice, and naturally fits into your everyday life. Whether you're building a 3D plant cell model for a school project, working, streaming, or shopping, you can simply speak aloud to get instant, real-time guidance without ever switching screens or pausing your workflow. Powered by our self-developed LynkSoul VLM v1 model, it precisely understands on-screen visuals and user actions, supporting fluid voice chat, natural interruption, and emotion recognition.

For gamers, HakkoAI offers universal compatibility across all titles, delivering instant strategy tips and live knowledge updates without tab-switching. Plus, with advanced features like Agentic Memory, Pinned Memory, Character Event, and long-term retention, it remembers your game highlights and preferences over time, allowing you to fully customize your partner's voice, language, and personality via the Workshop for a truly personalized experience.

⚡ Bonus: Edible or Digital Plant Cell Models
Short on time or want a twist? Try one of these:
- Edible Model: Use Jell-O for cytoplasm, candy for organelles, and graham crackers for the cell wall.
- Digital Model: Use free tools like Tinkercad, Blender, or mobile apps to create and animate a digital version.
How to make a plant cell model using Tripo Studio
For a modern twist on this classic project, you can create a digital 3D plant cell model using an AI tool like Tripo AI. This is a fast and powerful way to build a scientifically accurate model that you can view from any angle.
Here's a simple step-by-step guide:
- Create an Account: First, go to the Tripo AI website and sign up for a free account.
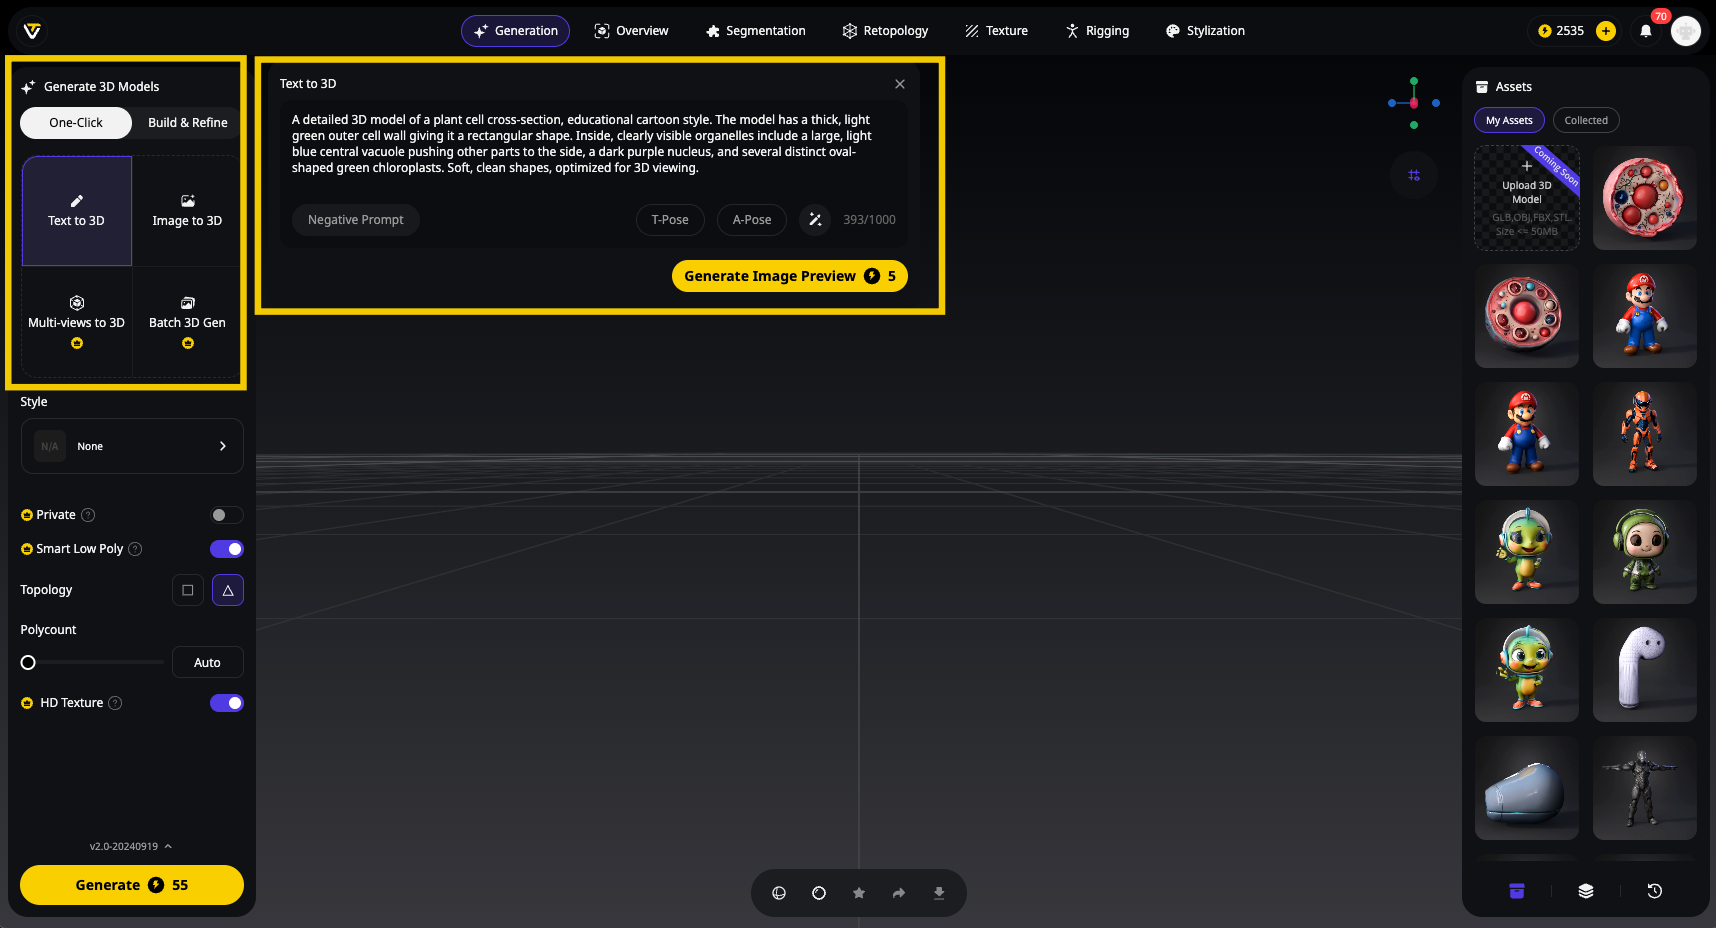
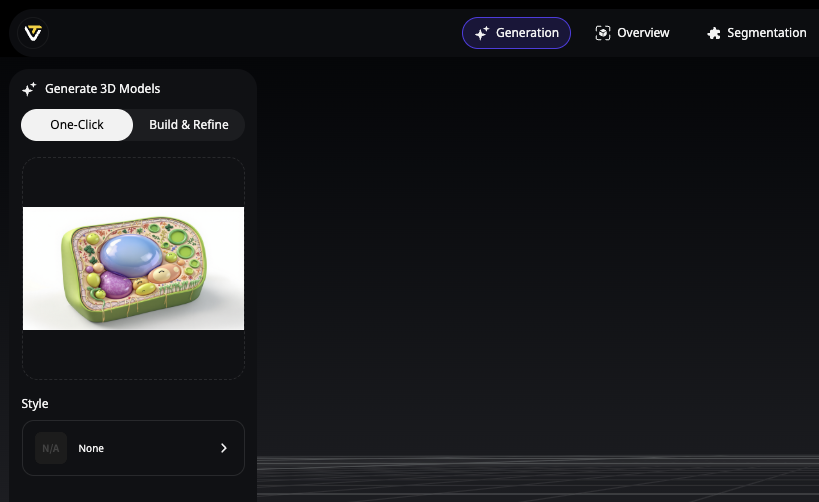
- Start Generating: From the main dashboard, look for the primary generation interface. You will see two main options: One-Click Generation or Build and Refine. Choose one-click generation to get a ready-to-use model.
- Provide Your Input:
- For Image-to-3D: If you have a reference image, you can upload a clear drawing of a plant cell here.
- For Text-to-3D: If you are starting from scratch, type a detailed description into the prompt box. For the best results, you need to be specific.
- Example Prompt to Use:
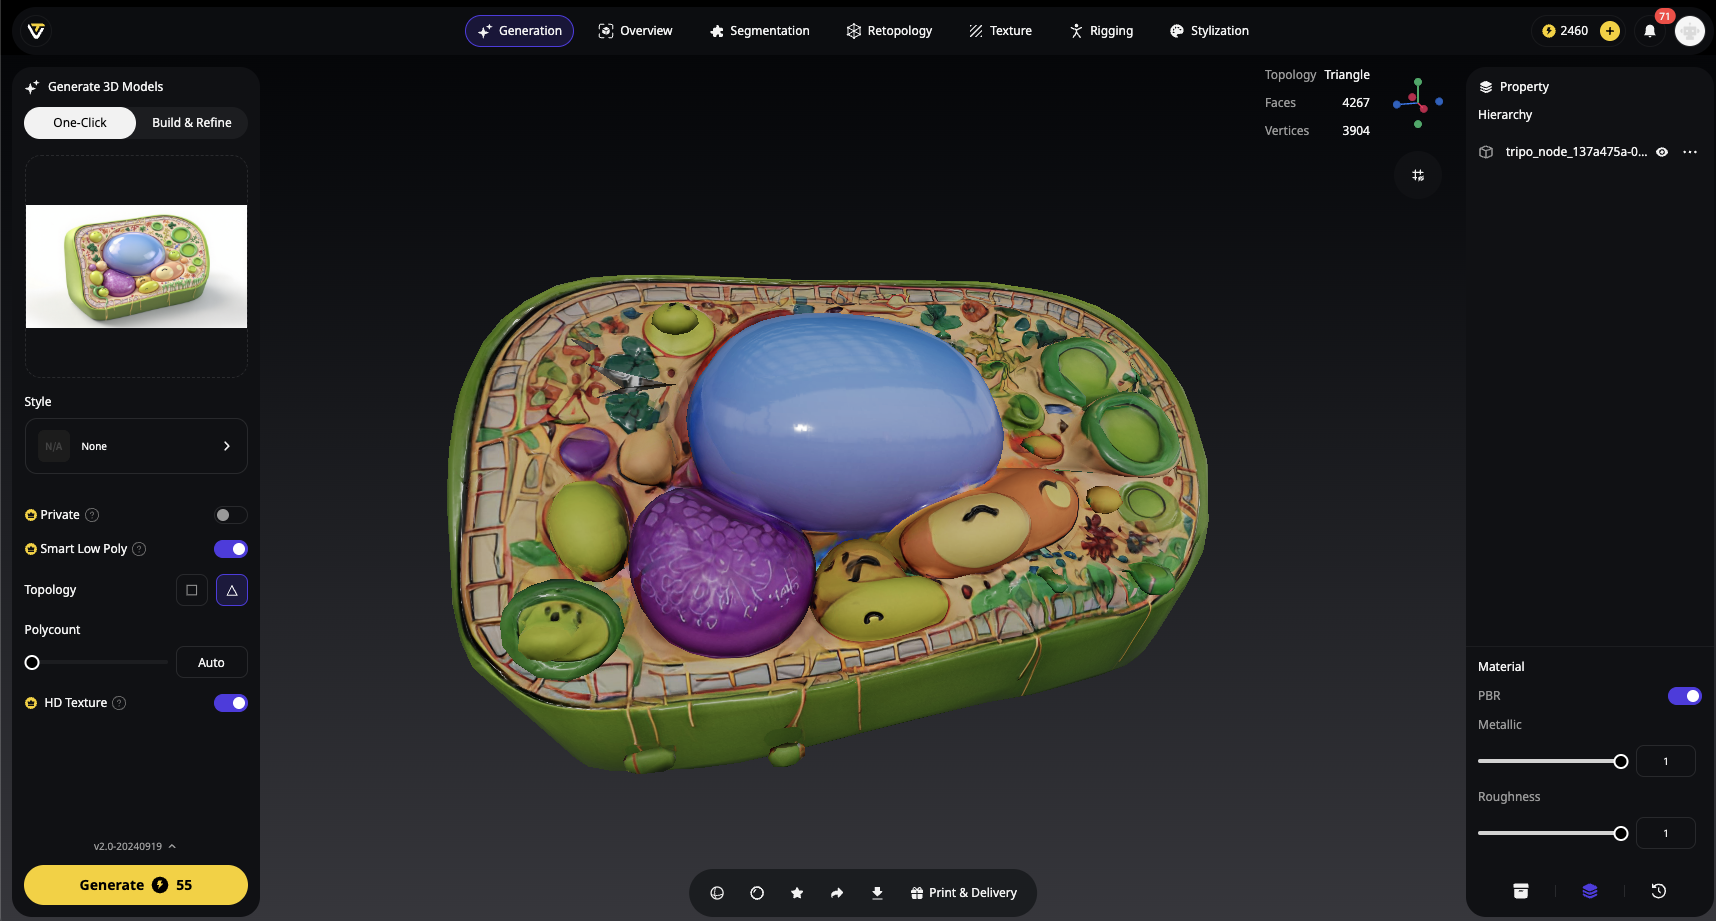
Astraight-on front viewof a detailed 3D model of a plant cell cross-section, educational cartoon style. The model has a thick, light green outer cell wall giving it a rectangular shape. Inside, clearly visible organelles include a large, light blue central vacuole pushing other parts to the side, a dark purple nucleus, and several distinct oval-shaped green chloroplasts. Soft, clean shapes, optimized for 3D viewing,flat perspective, no angle.
- Review the Image Preview: Tripo AI will generate a 2D image preview of what your 3D model will look like. This lets you check if the AI has captured your idea correctly before creating the final model.
- Generate Your Model: If the preview looks good, click "Generate." In seconds, Tripo AI will create your full 3D plant cell model, which you can then view, edit, or download for your school project.
👉 Visit the Example Plant Cell 3D Model
📚 FAQ: Plant Cell Model Questions
Q1: What shape should a plant cell model be?
- A: Plant cells have a rectangular or box-like shape due to the rigid cell wall.
Q2: What's the biggest difference between plant and animal cell models?
- A: Plant cells have a cell wall, chloroplasts, and a large central vacuole, which animal cells do not.
Q3: Can I make a plant cell model using household items?
- A: Yes! Use things like sponges, pasta, beans, and cotton balls — just get creative.
Q4: What grade levels usually do this project?
- A: This is a common project from Grade 5 to Grade 10, depending on curriculum.
Q5: Do I need to explain the function of each part?
- A: Yes — either in labels, a separate chart, or in your presentation.
📝 Conclusion
Making a plant cell 3D model is a creative and educational way to learn how cells function. Whether you build it with clay, candy, or code, the key is to clearly represent each part and explain what it does. Add your own creative flair, and you've got a project that's both informative and eye-catching!
