Fastest Way to Add Colors to AI 3D Models
Have you ever generated an amazing AI 3D model only to find yourself stuck with a boring gray surface? That lifeless gray appearance can make even the most detailed model look unfinished and unprofessional. The good news is that you don't need to be a texturing expert to bring your models to life with color!
This guide reveals the quickest and most beginner-friendly methods to add basic color to 3D models, with special focus on Tripo Studio's powerful AI-driven texturing tools that can transform your gray models in minutes.
Why Basic Colors Matter for Your 3D Models
Even simple color application dramatically improves how viewers perceive your 3D creations:
- Creates visual hierarchy and focal points
- Helps identify different parts and components
- Makes models more engaging and presentable
- Provides a foundation for further detailing
The challenge? Traditional coloring methods require technical knowledge of UV mapping, texture painting, and material setup. But with modern AI tools like Tripo Studio, you can bypass most of these technical hurdles.
Tripo Studio: The Fastest Way to Color 3D Models
Tripo Studio's AI texturing capabilities represent the most efficient path from gray to colorful. Their "Image to Texture" feature is particularly powerful for beginners who want professional results without the learning curve.
Creating Your Color Blueprint
Before diving into Tripo Studio, you'll need a color reference image:
- Capture a screenshot of your gray 3D model from a clear, front-angled view
- Create a colored version using one of these methods:
Use an AI image generator like ChatGPT or Google Gemini to recolor your screenshot
Manually paint colors in a simple program like MS Paint or Photoshop
For AI-assisted coloring, try a prompt like: "Apply a simple color scheme to this character—body blue, helmet gold, boots black" along with your screenshot.
Pro Tip: Keep colors simple with clear boundaries between different parts. Flat colors work best for this stage.
Applying Colors in Tripo Studio
Now let's transform your gray model with Tripo's AI texturing:
- Upload your 3D model to Tripo Studio
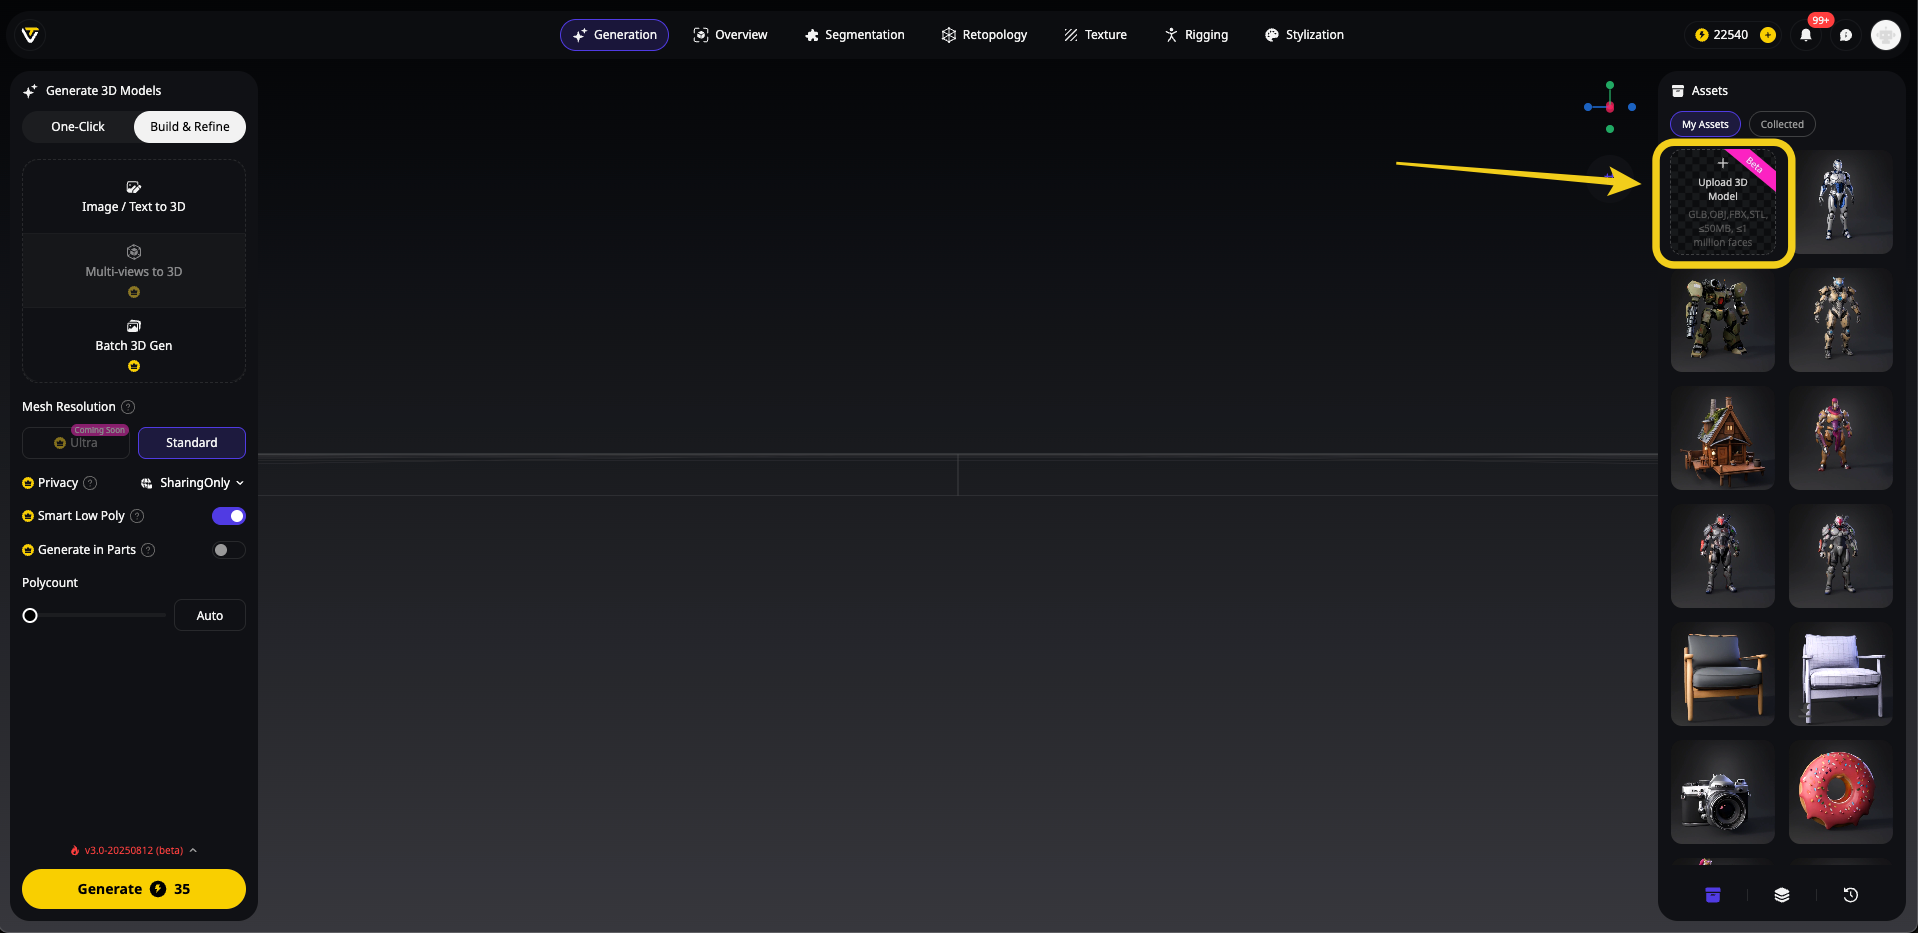
- Navigate to the Texture tab in the workspace
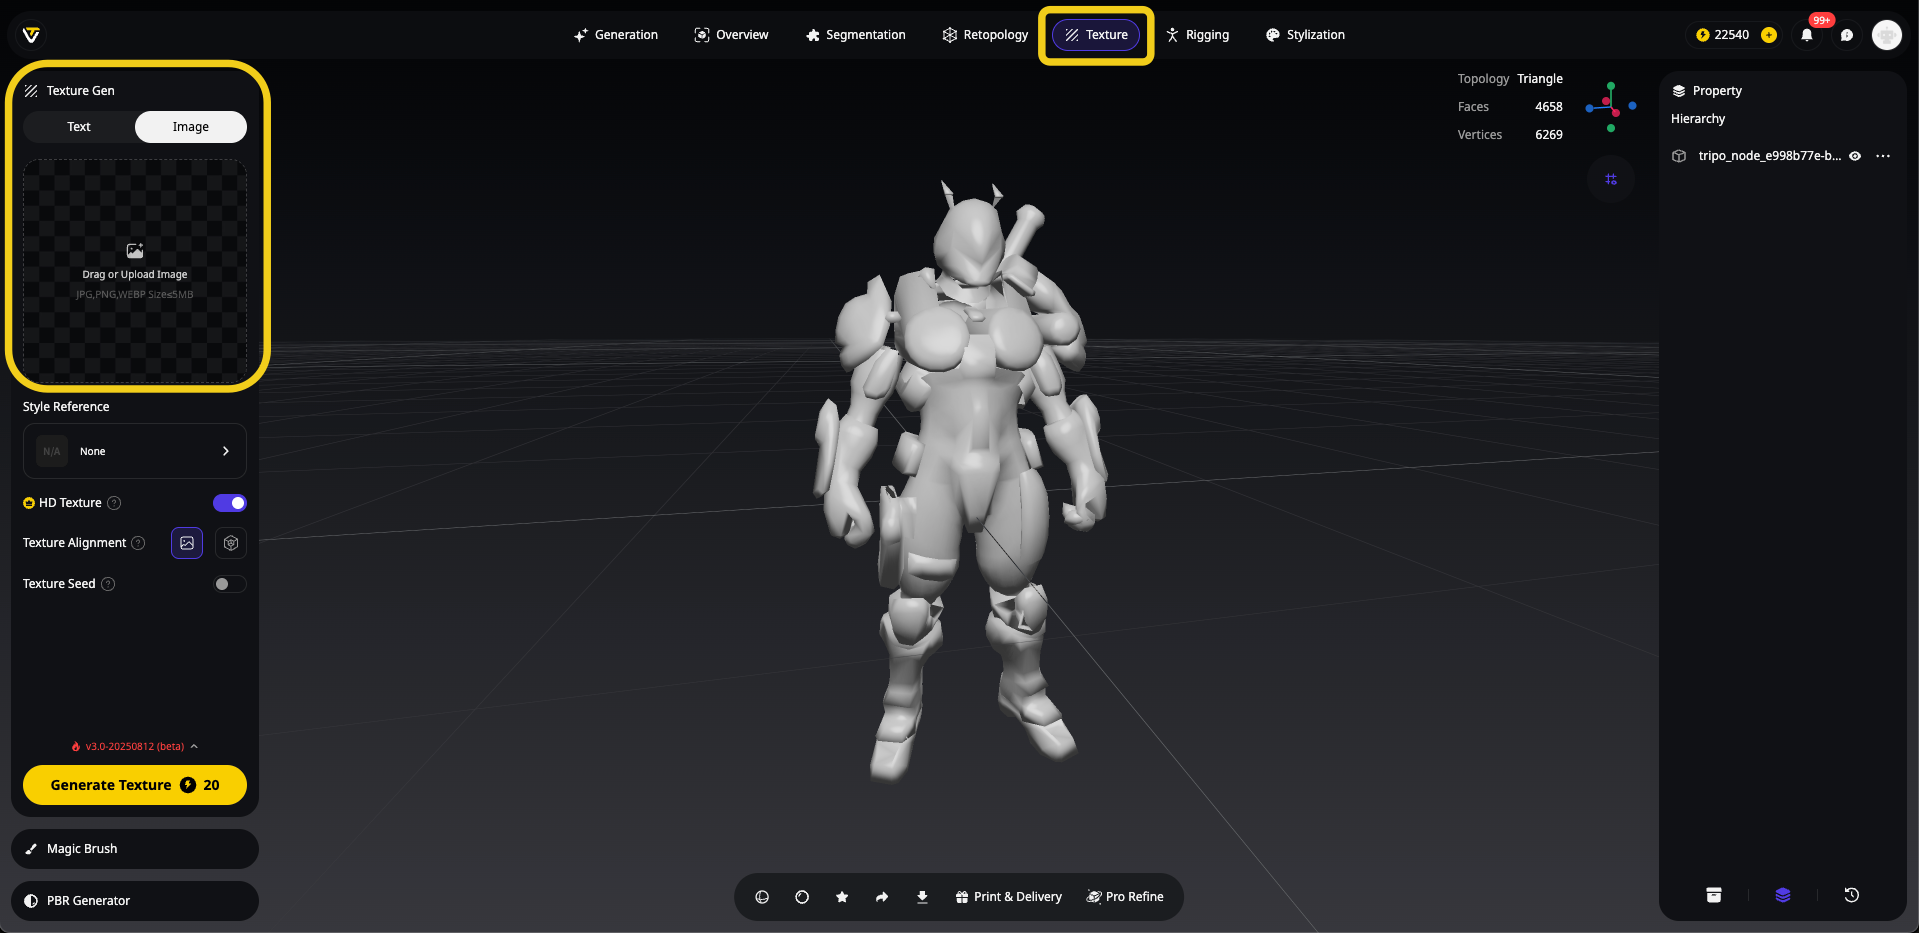
- Select Image to Texture from the texturing options
- Upload your color blueprint image as the reference
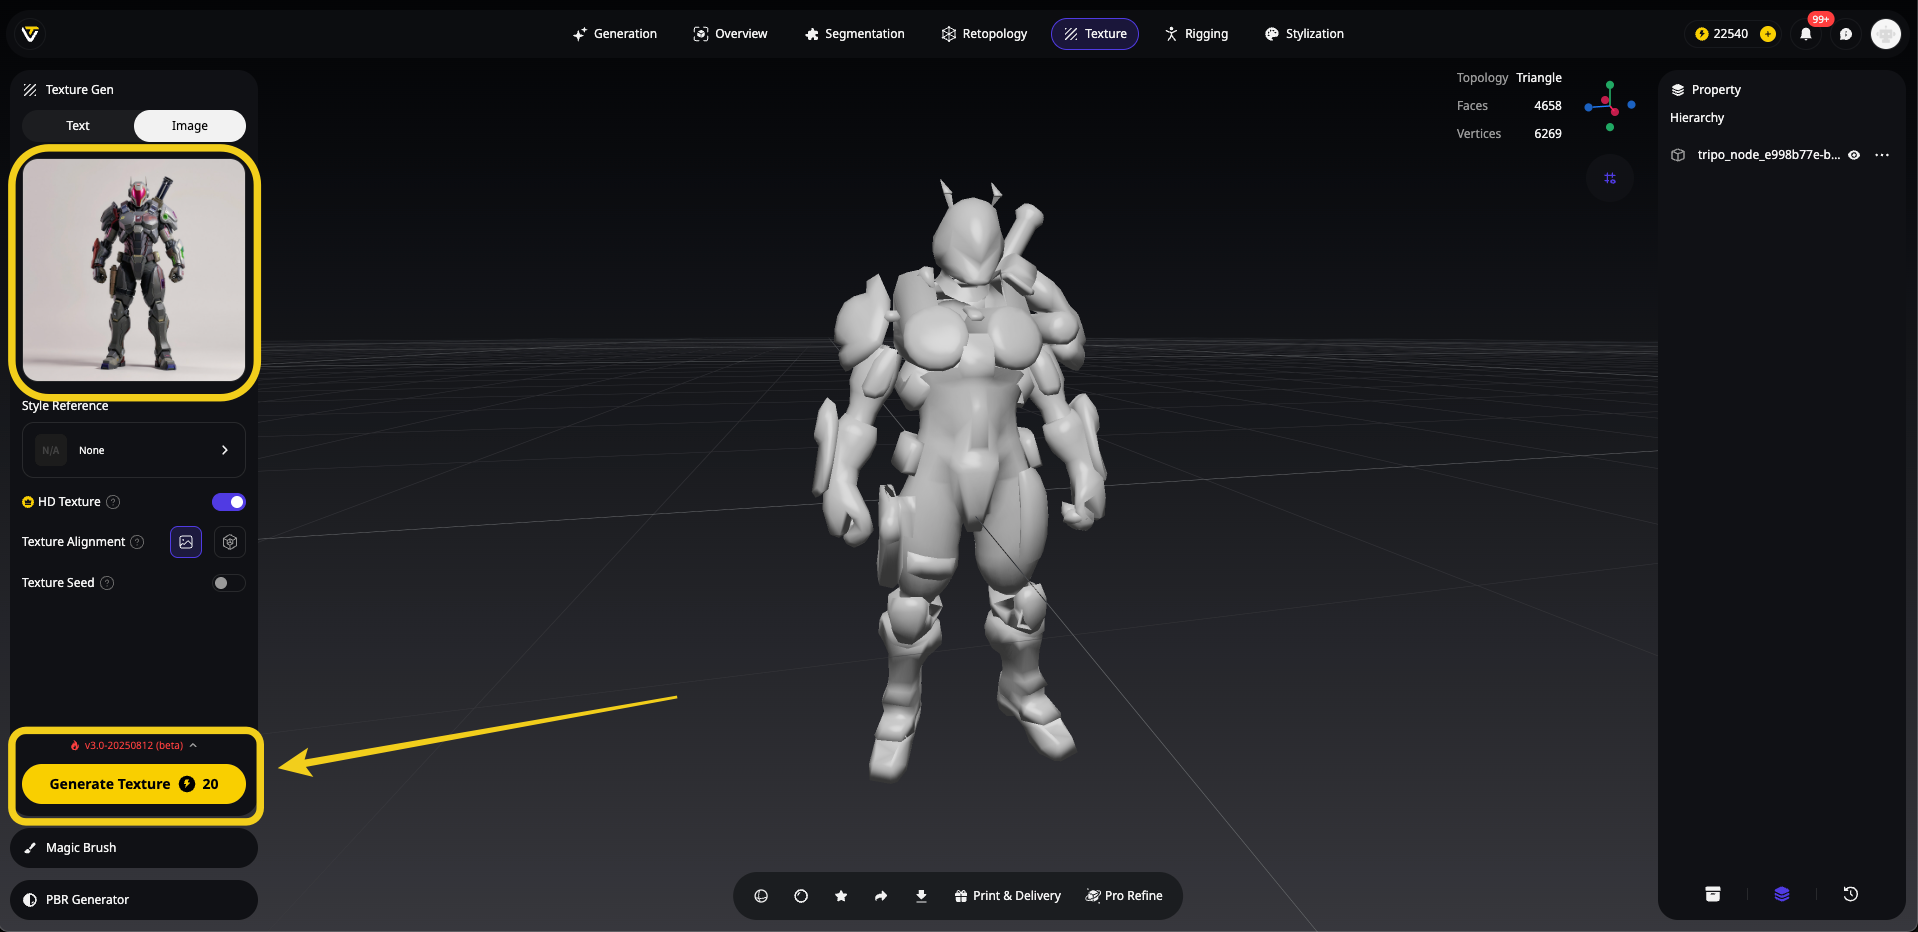
- Adjust settings if needed (you can control detail level and style)
- Generate the texture and watch as colors are intelligently mapped to your model
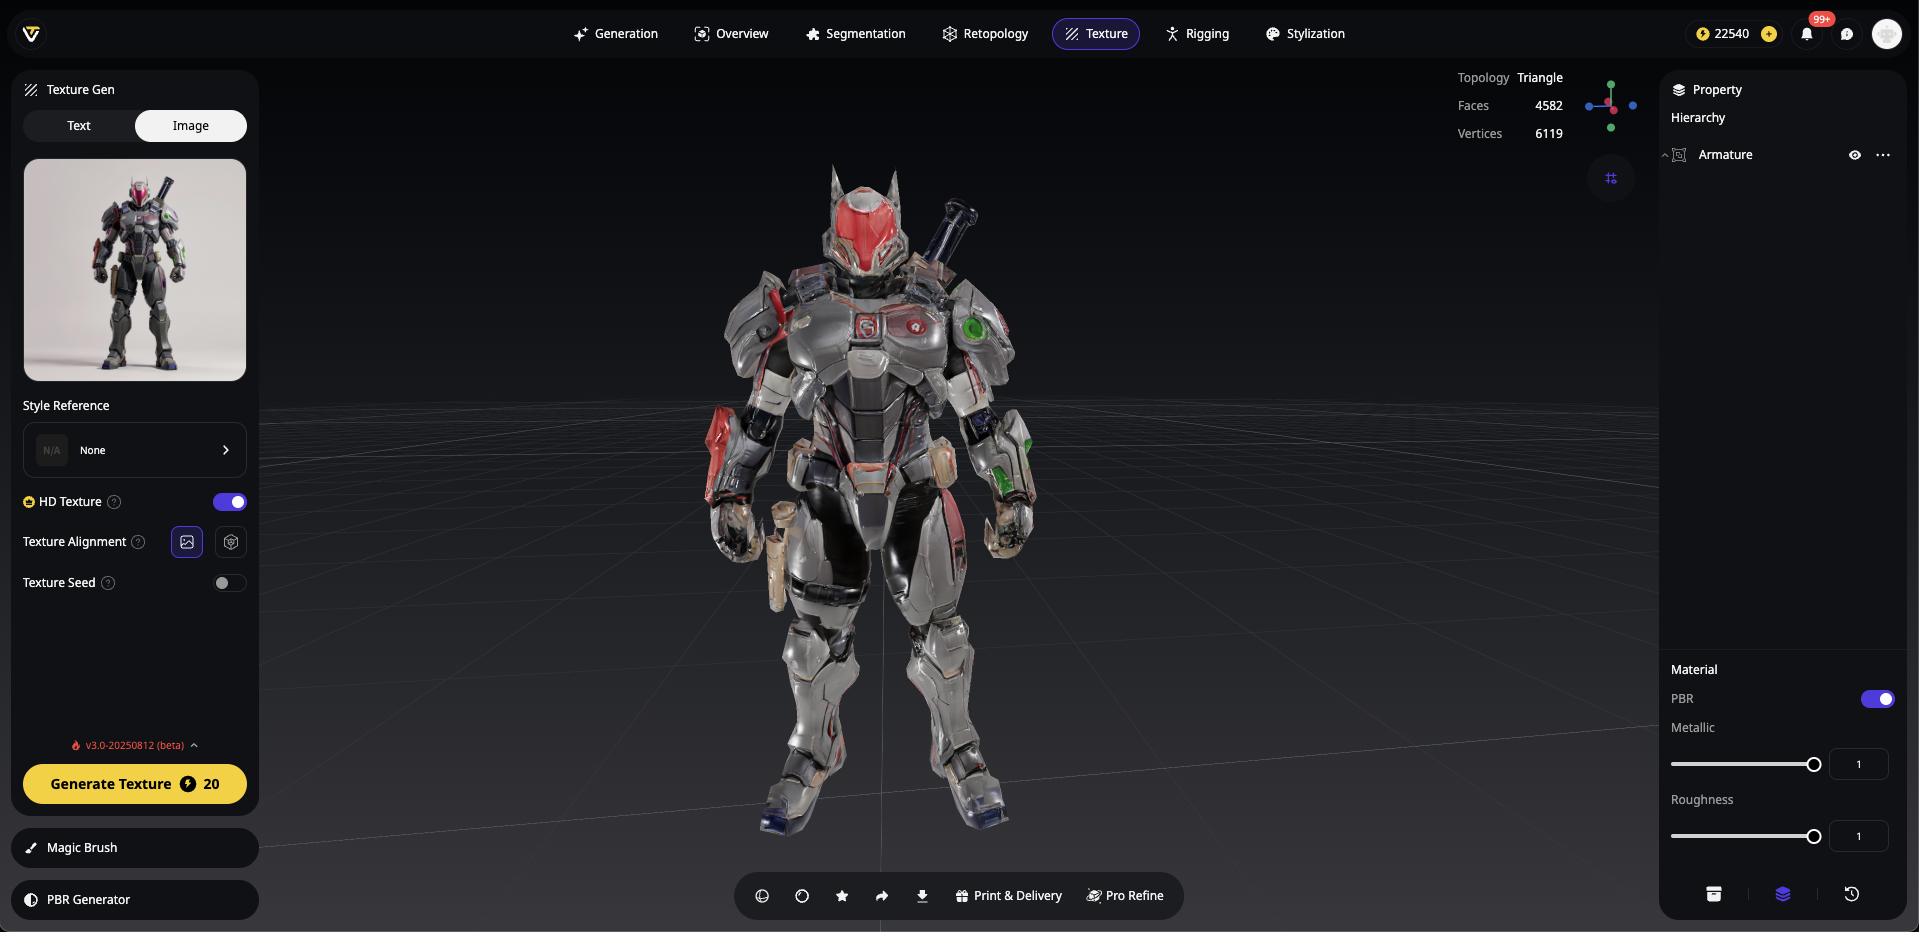
What makes this method revolutionary is that Tripo doesn't just apply flat colors—it intelligently interprets your reference to create proper texture maps with appropriate material properties.
Bonus Feature: Tripo Studio's Magic Brush tool allows you to make selective color adjustments after the initial texturing, perfect for tweaking specific areas.
Alternative Method 1: Blender Vertex Paint (More Control)
If you prefer more hands-on control and have basic Blender knowledge:
- Import your model into Blender
- Switch to Vertex Paint mode in the Mode dropdown
- Select colors from the color wheel and paint directly on your model
- For better results, you may need to increase vertex density first with a Subdivision modifier
- To make vertex colors visible in renders, create a material and connect the "Color Attribute" node to the "Base Color" input of your shader
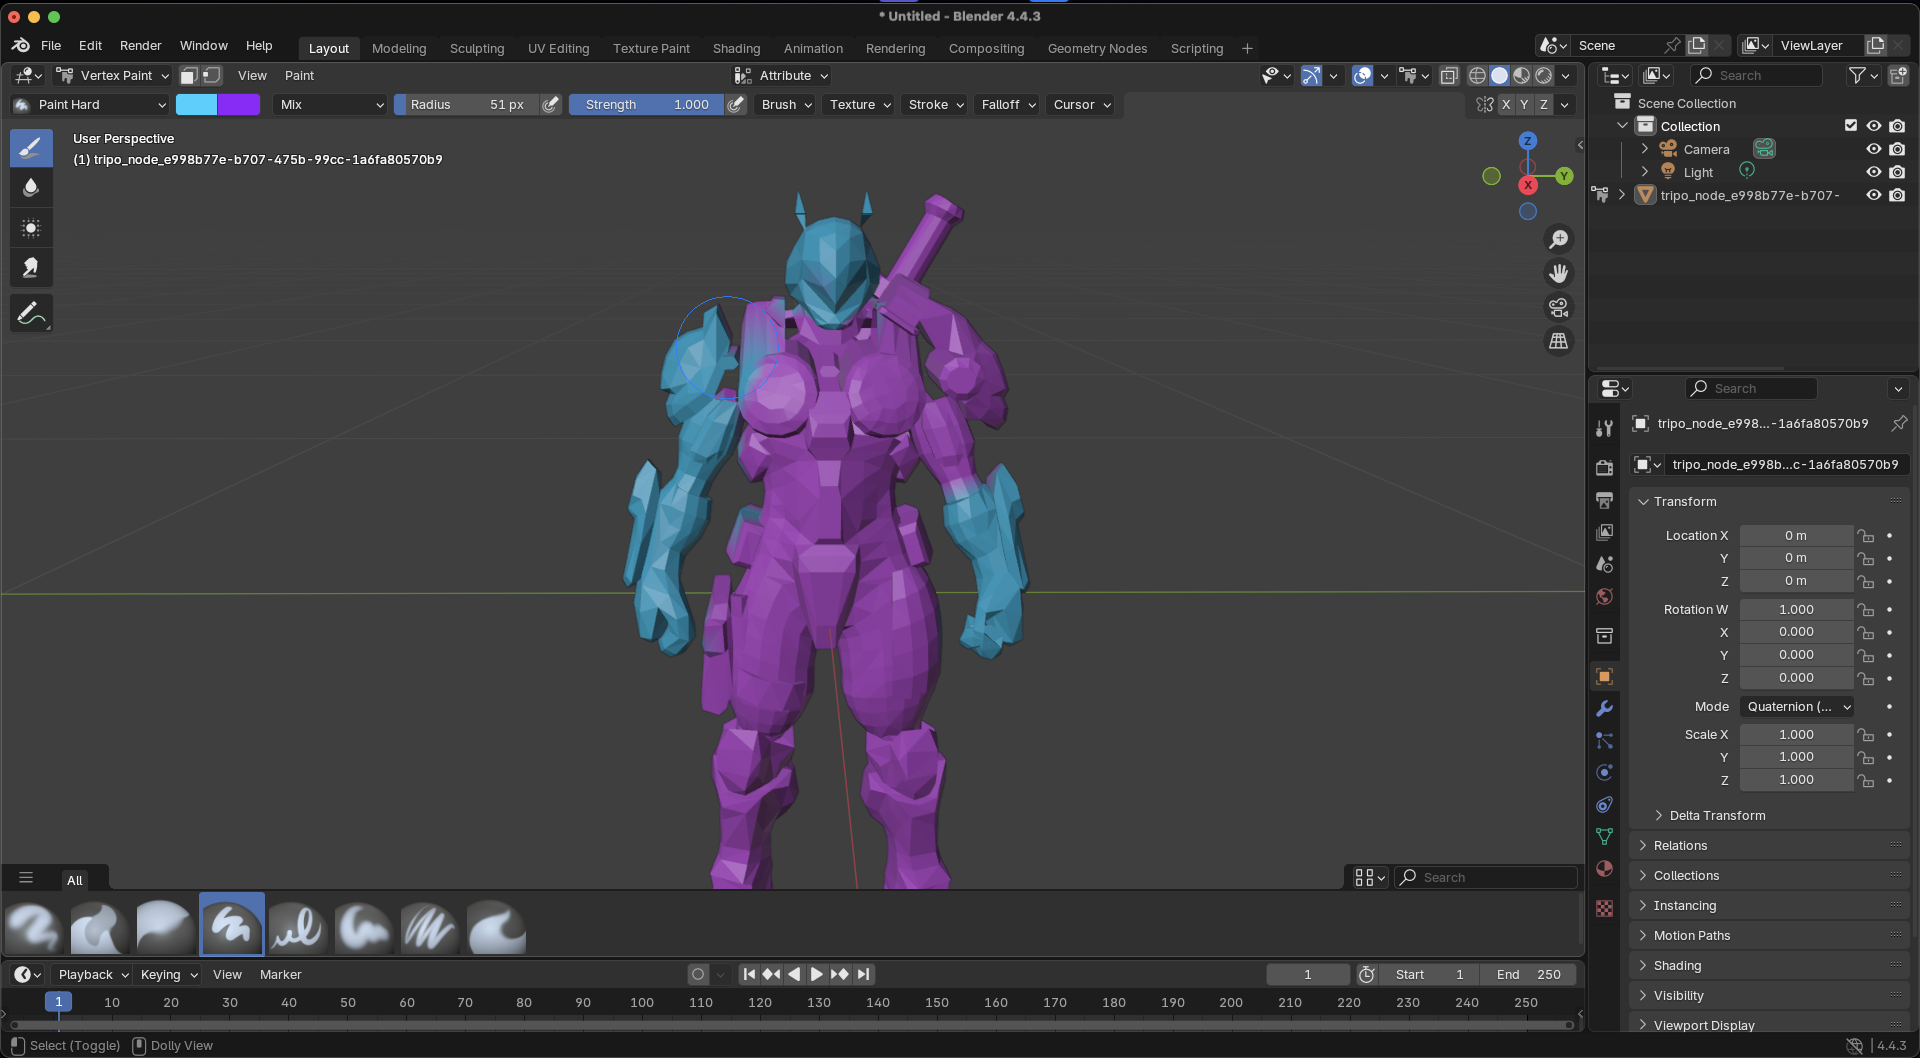
This method gives you precise control but requires more time and familiarity with Blender's interface.
Alternative Method 2: Microsoft Paint 3D (Ultimate Simplicity)
For absolute beginners working with simple models:
- Open your model in Microsoft Paint 3D
- Use the Brushes and Fill tools to apply colors directly
- The Stickers feature can add patterns or details
- Export your colored model when finished
While limited in capability, Paint 3D offers a no-pressure environment to experiment with basic coloring concepts.
Comparison: Coloring Methods for 3D Models
Tips for Better Color Results
Assalamu Alaykum she had been kidnapped plate clear bye solution OK
- Start simple with a clear color scheme (2-5 colors maximum)
- Consider color theory basics (complementary colors create visual interest)
- Use references from similar objects in real life or stylized examples
- Test in different lighting conditions to ensure colors work well
- Save versions as you go to compare different color schemes
Ready to Color Your Models?
Adding basic colors to your 3D models doesn't have to be complicated or time-consuming. With Tripo Studio's innovative AI texturing tools, you can transform gray models into vibrant, professional-looking assets in minutes rather than hours.
The next time you generate an AI 3D model, don't settle for the default gray look. Take a few minutes to add colors using the methods described above, and watch how your creation comes to life with newfound visual interest and character.
Ready to move beyond gray? Try Tripo Studio today and experience the fastest way to apply perfect color schemes to your 3D models with AI-powered tools!
Have you tried coloring your 3D models with Tripo Studio? Share your before-and-after results in the comments below!
Common Questions About Coloring 3D Models
Is the Tripo method good for simple, cartoon-style colors?
Yes! If your uploaded reference image uses flat, solid fills, the Image-to-Texture feature will produce an RGB map in that style. You can also adjust the detail settings to keep the look clean and simplified.
What if I only need flat colors with no extra detail?
While pure flat colors are easier to achieve in manual tools like Blender Vertex Paint, Tripo Studio is so fast it's worth trying first. You can always reduce material complexity in the settings if you want a simpler look.
How accurate is AI at placing the colors?
Tripo's Image-to-Texture technology is remarkably good at mapping colors to the correct parts of your model, especially when your reference image is taken from a similar angle. The system understands spatial relationships and can identify components like "shoulders" or "helmet" to place colors appropriately.
Do I need to create UV maps first?
No! That's one of the biggest advantages of using Tripo Studio for coloring. The AI handles the UV mapping process automatically, saving hours of technical setup.
