How to Create a 3D Model for Printing: A Comprehensive Guide
Creating a 3D model for printing is an exciting process that transforms your digital ideas into tangible objects. Whether you're a hobbyist or a professional designer, understanding the steps to design and prepare a 3D model for printing is essential. This guide walks you through the entire process—from brainstorming and modeling to optimizing and exporting your design for 3D printing.
1. Conceptualize Your Design
Every great 3D printed object starts with a solid concept.
- Sketch Your Ideas: Begin by drawing rough sketches of your object. Consider its function, dimensions, and details.
- Define Purpose and Scale: Identify the purpose of your model and decide on the scale. Will it be a decorative item, a functional part, or a prototype?
2. Choose the Right Software
Selecting the appropriate software depends on your skill level and project requirements.
- Beginner-Friendly Options:
- TinkerCAD: Great for simple designs and beginners.
- Fusion 360: Offers more advanced features while remaining user-friendly.
- Advanced Tools:
- Blender: Ideal for intricate, artistic designs.
- SolidWorks or Rhino: Perfect for engineering and professional-grade models.
| Software | Ease of Use | Skill Level | Capabilities | Cost | Ideal For |
|---|---|---|---|---|---|
| TinkerCAD | Very Easy | Beginner | Basic 3D modeling, simple designs, quick prototyping | Free | Hobbyists, educators, and beginners |
| Fusion 360 | Moderate | Beginner to Intermediate | CAD modeling, product design, prototyping, simulation | Free for personal use; Subscription for professionals | Product designers and engineers |
| Blender | Moderate to Advanced | Intermediate to Advanced | Comprehensive 3D modeling, sculpting, animation, rendering, VFX | Free, Open Source | Artists, animators, and game developers |
| SolidWorks | Moderate | Advanced | Professional-grade CAD, engineering, simulation, complex assemblies | Paid (Subscription-based) | Engineers, industrial designers, and professionals |
This table should help you decide which tool best suits your needs based on your skill level, project requirements, and budget.
3. Create Your 3D Model
Follow these tips to ensure your design is print-ready:
- Start with Basic Shapes: Build your model by combining basic geometric shapes and refining them.
- Design for Printing: Keep in mind the limitations of 3D printers. Ensure that overhangs, bridges, and fine details are supported by proper design.
- Maintain Wall Thickness: Avoid designs with walls that are too thin; they might not print properly or could break easily.
- Ensure a Watertight Mesh: Your model should be a closed, manifold mesh with no holes or non-manifold edges. Many 3D software packages have tools to check and repair these issues.
4. Optimize and Prepare the Model
Before exporting your model, it's crucial to optimize it for printing:
- Scale Your Model: Ensure your design is to the correct scale for your project.
- Check for Errors: Use tools like Meshmixer or the built-in functions in your modeling software to repair any mesh errors.
- Simplify the Geometry: Reduce the polygon count if possible without sacrificing quality. This can help with faster slicing and smoother printing.
5. Export to the Correct File Format
The most common file format for 3D printing is STL.
- Export Settings:
- In your software, select Export and choose STL.
- Ensure the export settings maintain the accuracy and scale of your model.
6. Slice Your Model
Slicing software converts your 3D model into layers and generates the G-code needed by the 3D printer.
- Popular Slicing Tools:
- Ultimaker Cura: Widely used and supports many printers.
- PrusaSlicer: Great for Prusa printers and offers advanced settings.
- Adjust Print Settings:
- Set layer height, print speed, and support structures based on your printer's capabilities and your model's complexity.
- Preview the Layers: Use the slicer's preview function to check the layers and support structures before printing.
Want to learn more? Check out this detailed guide: How to Use Slicer Software
7. Print Your Model
With the G-code ready, you're all set to start printing.
- Prepare Your Printer: Ensure your 3D printer is calibrated and has the correct filament loaded.
- Monitor the Print: Keep an eye on the first few layers to ensure proper adhesion and print quality.
- Post-Processing: After printing, remove any supports and perform necessary finishing touches such as sanding or painting.
Tripo: The Ultimate Tool for 3D Printing
If you're looking for a powerful yet user-friendly tool to generate ready-to-print 3D models, Tripo is the perfect choice. Tripo is an AI-powered 3D model generator that allows users to create professional-quality models with ease.
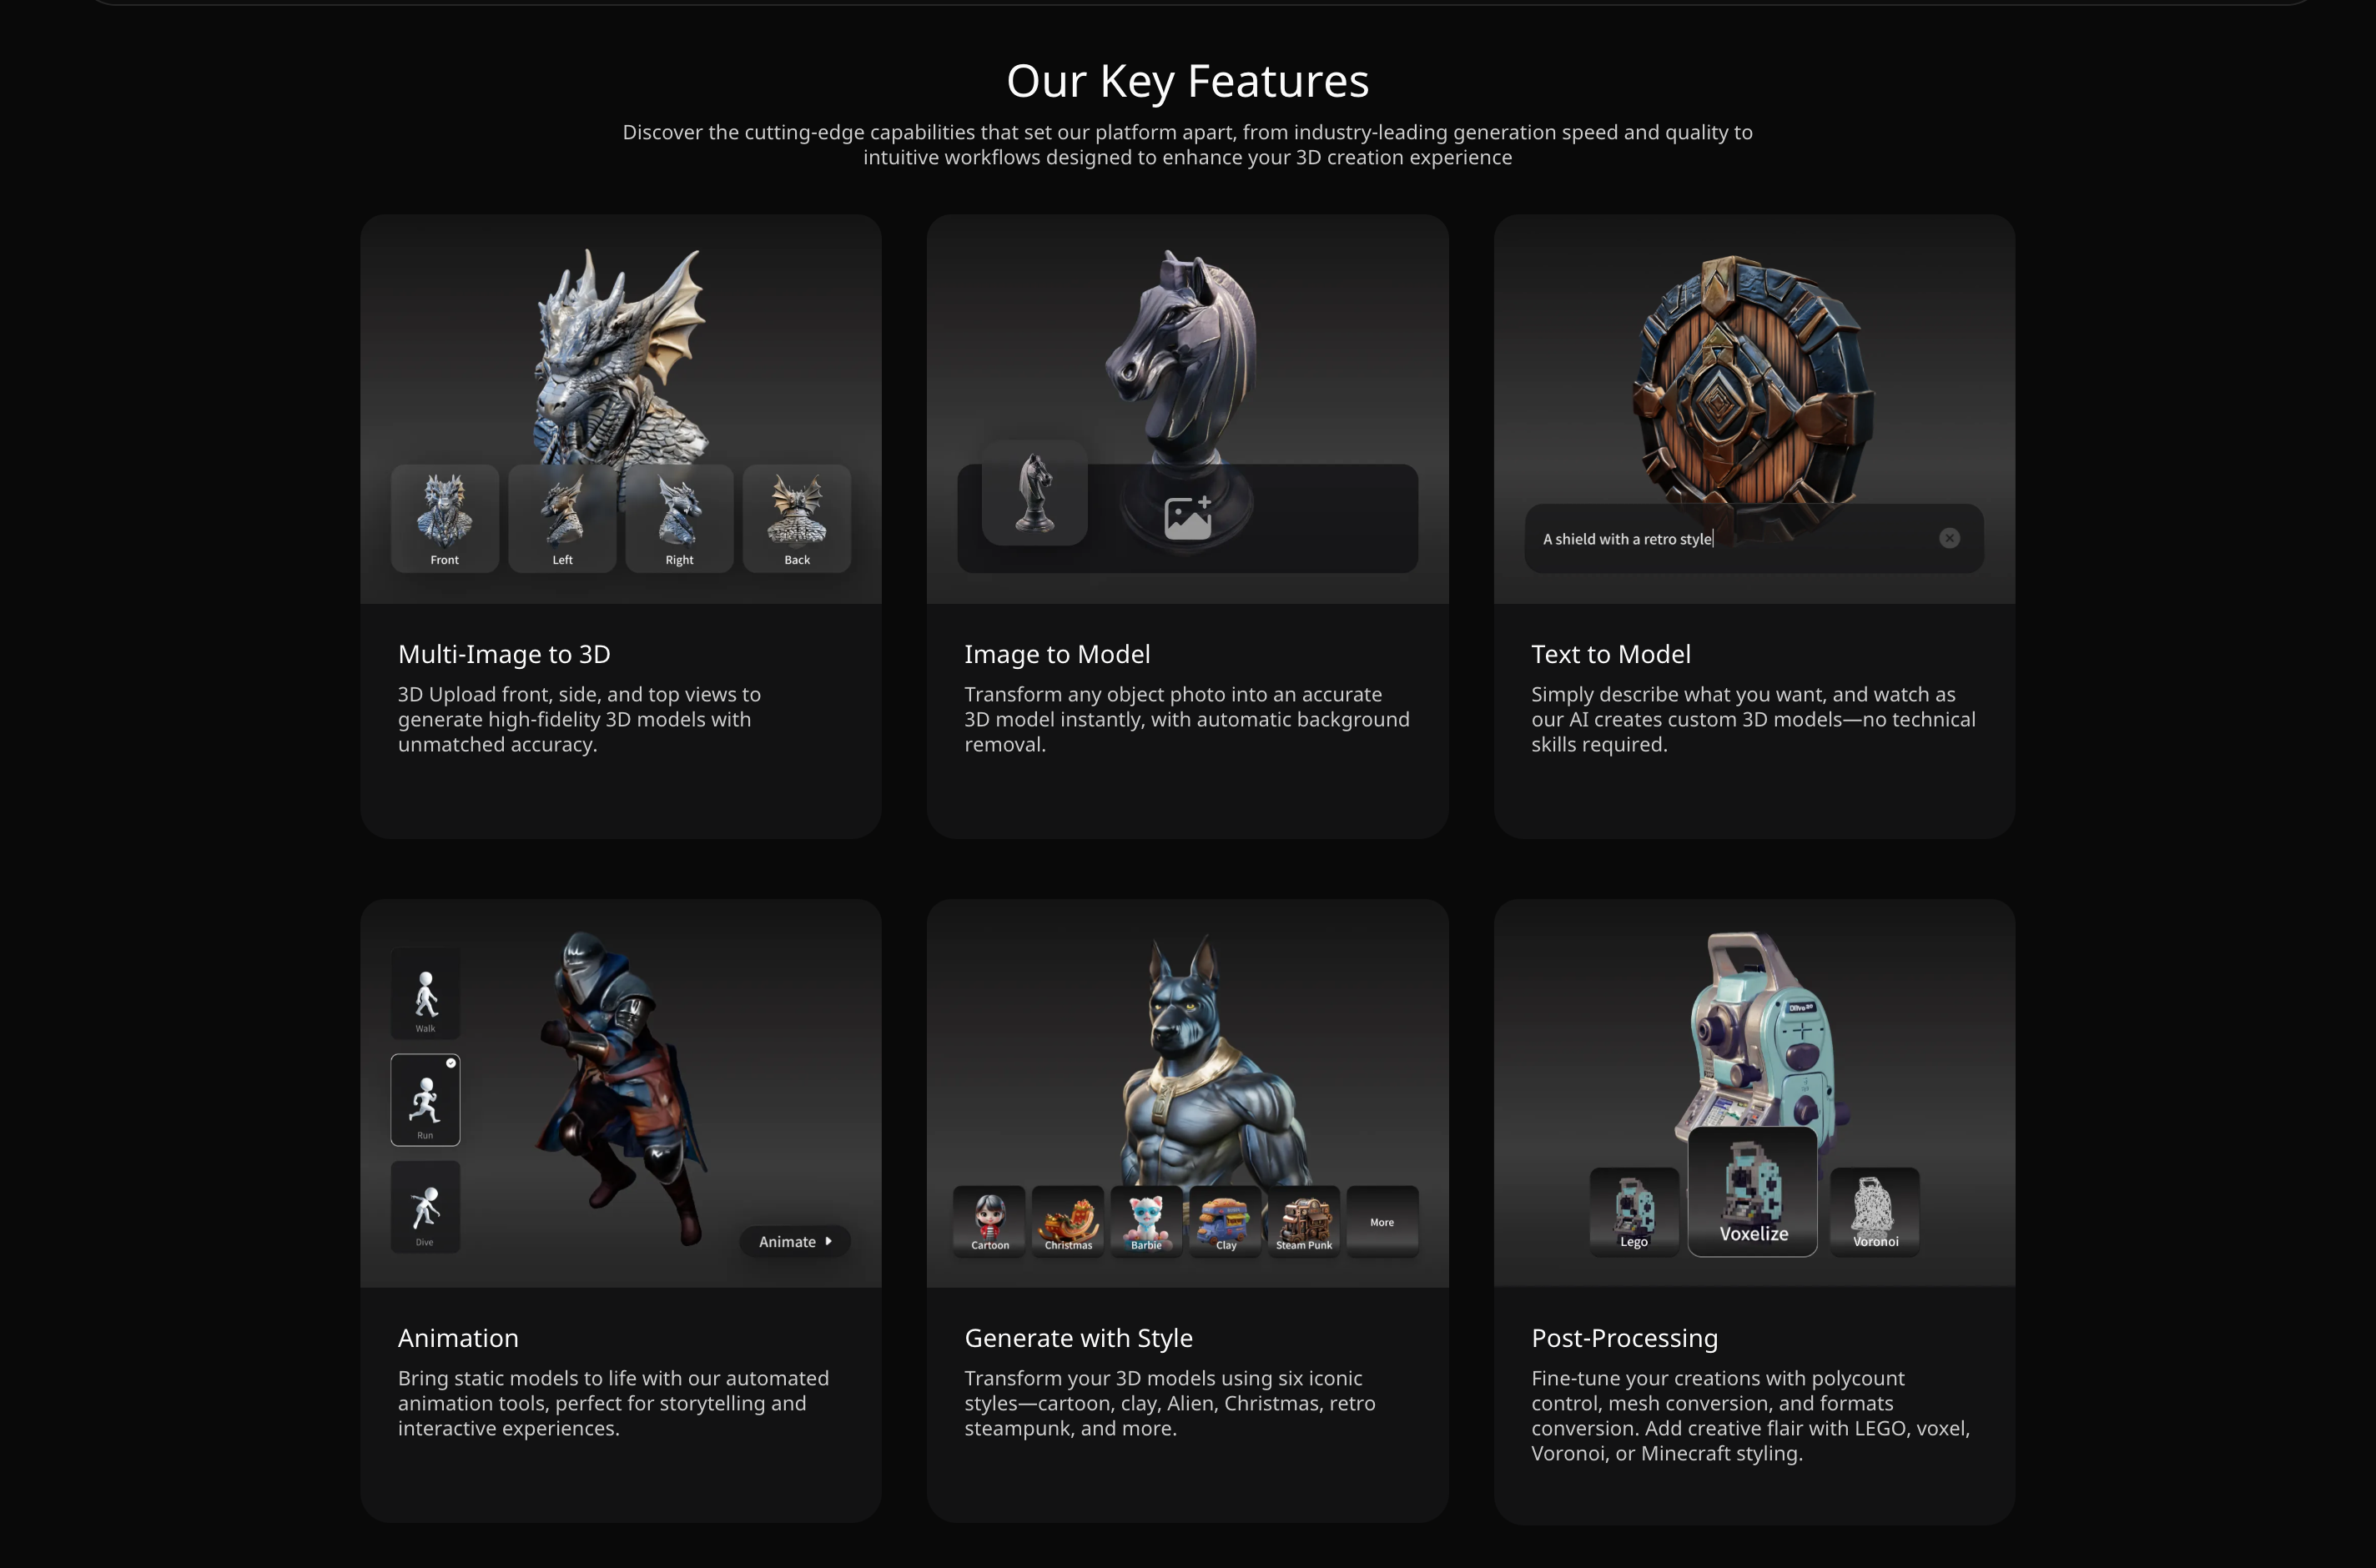
Why Use Tripo for 3D Printing?
- Instant 3D Model Generation: Simply enter text, upload reference images, or choose from a variety of templates to create a high-quality 3D model in seconds.
- Ready-to-Print Optimization: Tripo ensures that all generated models are properly structured for 3D printing, avoiding issues like non-manifold geometry or thin walls.
- Supports Multiple Formats: Tripo enables seamless export to STL, OBJ, FBX, and other commonly used formats, making it compatible with any 3D printer or software.
- User-Friendly & AI-Powered: No prior 3D modeling experience is required—Tripo's AI assists with automatic adjustments and refinements.
With Tripo, you can eliminate the hassle of manual 3D modeling and focus on printing high-quality models with ease.
Conclusion
Creating a 3D model for printing is a rewarding process that combines creativity, technical skills, and a bit of engineering. Tripo makes this easier than ever by generating high-quality, ready-to-print 3D models in just a few clicks.
By following these steps—from conceptualizing your design and choosing the right software to optimizing your model, exporting, and finally printing—you can bring your digital creations into the physical world. Whether you're a beginner or a professional, Tripo's AI-powered automation and multi-format export options streamline the entire process.
