Add Topology to a Flat Face in Blender Easily
In 3D modeling, topology is key, and Blender is a top tool. Learning to add topology to flat faces boosts your skills. It makes shapes more detailed and dynamic. It also makes models run better, which is great for games needing realistic textures.
Knowing how to add topology well helps you as a sculptor and designer. You can turn simple faces into complex shapes with subdivision and the Displace modifier. This article will show you how to do it in Blender, making you better at 3D modeling.
Key Takeaways
- Effective topology is essential for creating detailed and realistic models in Blender.
- Game companies use displacement mapping to optimize textures and maintain performance.
- A plane can be subdivided up to 100 cuts for enhanced sculpting details.
- UV maps are crucial for precise texture application on models.
- Maintaining quads and evenly spaced edges improves results when using subdivision modifiers.
- Creating complex models in Blender can be time-consuming but rewarding for quality outcomes.
Introduction to Topology in 3D Modeling
Topology is key in 3D modeling. It deals with how vertices, edges, and faces are arranged in a digital model. This setup affects mesh quality and how surface details look and move.
Quads are the top choice for polygons in 3D modeling. Triangles are used in games for fast rendering. Models with more polygons show more detail but need more power.
Even polygon distribution is important for animation. It makes sure models move smoothly. Tools like Blender help with this, using edge loops to improve modeling.
Artificial intelligence is changing 3D modeling. Tools like ZBrush make retopology easier. About 70% of animated meshes need good topology for smooth movement.
Understanding the Importance of Topology
Topology is key in 3D design. It affects how models look and perform. It's about how vertices, edges, and faces are arranged in a 3D model.
Good topology stops problems like unwanted artifacts. These problems come from using certain shapes in models. They get worse as the angle between faces increases.
In low-poly art, non-quad topology is often needed. But, it's best to aim for quad-based models. Quads are better for deformation and subdivision, making the model look smoother.
When making a mesh denser to fix issues, be careful. A denser mesh can make things harder. Keeping the topology clean is key for smooth animation and rendering.
Support loops are important for better subdivision quality. They help distribute edges well without messing up the mesh.
Knowing about mesh parts is crucial. A vertex is a point, an edge connects two, and a face is a surface. Triangles can cause problems in animation, but quadrangles are better. Normals are important for shading and must be managed well.
In short, understanding topology helps 3D designers make better models. By focusing on quad designs and paying attention to details, artists can improve their work.
Click to Watch Video Tutorial.
Getting Started with Blender for Topology Addition
Before you start adding topology in Blender, you need to know the software basics. First, download and install Blender. Make sure your computer meets the system requirements for the best performance. A good software setup makes modeling easier.
The Blender interface has many tools to help with 3D modeling. Learning about these tools makes adding topology easier. Knowing how to use the 3D Viewport and modifiers is key.
Start by using Blender's documentation to learn about topology addition. This guide on retopology helps improve your workflow and model quality.
Setting up a comfortable workspace in Blender makes modeling better. You can choose between floating panels or a fixed layout. Personalizing your interface helps you find tools quickly. Learning Blender's basics is important for complex tasks like adding topology.
Creating a Plane in Blender
To start your 3D modeling in Blender, making a plane is key. A plane is a flat surface that you can shape and decorate. It's a basic step that helps you create detailed designs.
Setting up your Blender workspace well makes modeling easier. It lets you work in a neat and organized space.
Setting Up Your Workspace
Begin by making your Blender workspace your own. Pay attention to the 3D viewport, where you'll do most of your work. Make sure panels like the Outliner and Properties are close by.
This setup helps you move quickly between objects and settings. Knowing the keyboard shortcuts can also make your work faster.
Adjusting Viewport Settings for Sculpting
Now, adjust your viewport settings for sculpting. Choose "Material Preview" or "Rendered" for a clear view of textures and materials. Use overlays to see wireframes and other important details.
These changes improve what you see and make sculpting easier. They help you work better on your plane.
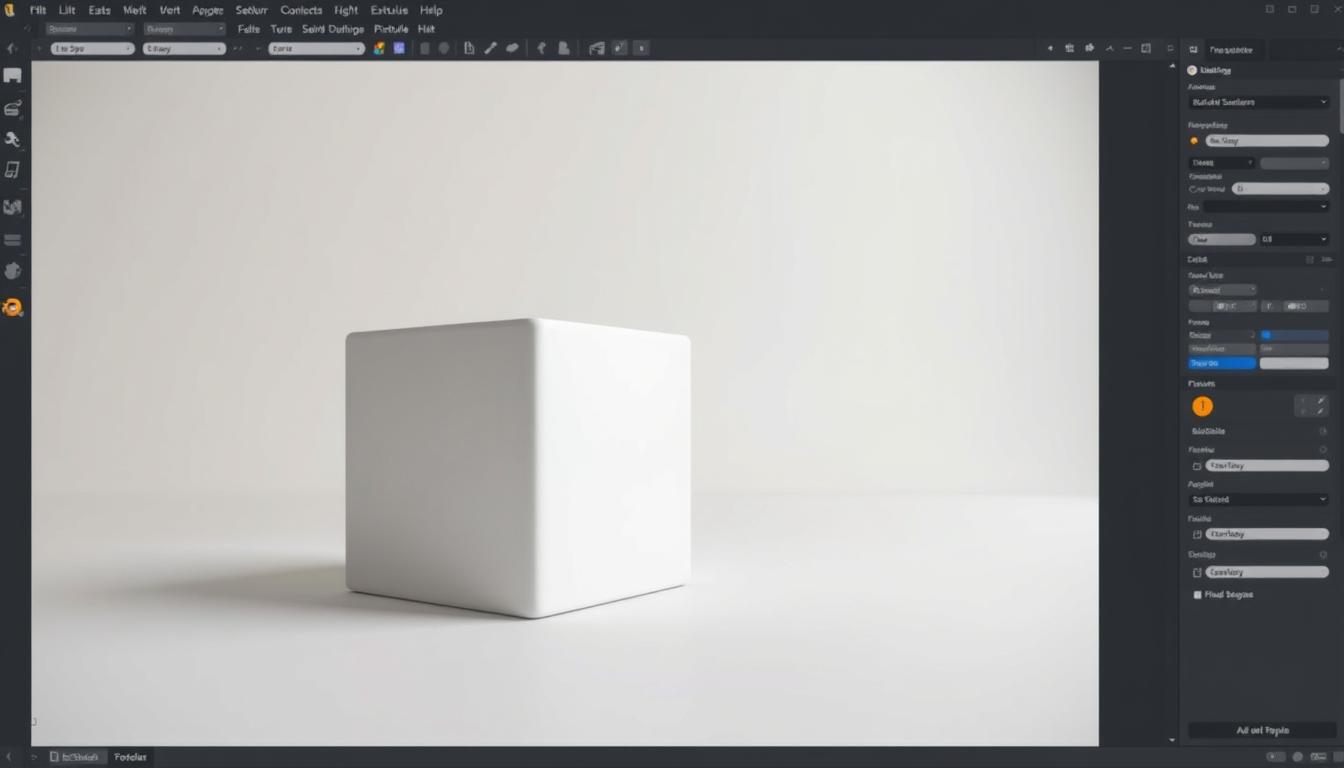
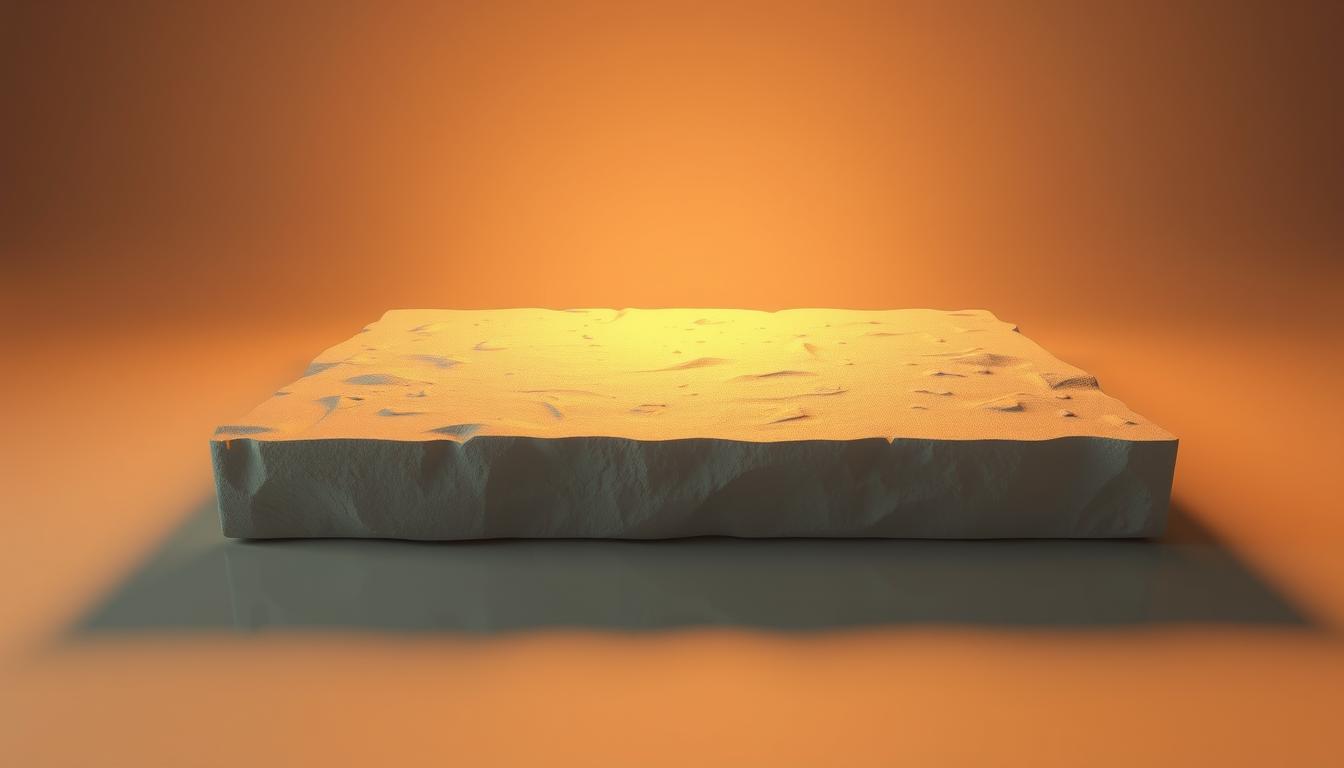
How to Add Topology to a Flat Face in Blender
Adding topology to a flat face in Blender is key for detail and sculpting prep. By using Blender techniques, you can make your model's surface more detailed. This makes your design's fine details stand out.
Step-by-step Process to Add Topology
Start by making a plane in the 3D view. Then, go into Edit mode and pick the plane. Use "Subdivide" to add cuts, usually between 1 and 100. More cuts mean more vertices, which helps in capturing small details.
Subdividing Faces for Better Detail
When subdividing, use Limited Dissolve to keep file size down. Change the angle settings to 2.5 to keep important details. Displacement mapping is great for realistic textures, making objects look real with fewer polygons.
Displacement maps can cut down faces, making things run smoother. Each vertex group needs careful picking for precision. UV maps help texture alignment. Adjust Displace settings for the right texture look.
Learning these Blender tricks can make your modeling better. It's good for both still and moving designs. Don't forget to clean up faces to keep your model right.
Utilizing Blender’s Sculpt Mode
Blender’s Sculpt Mode is great for artists who want to make complex shapes easily. It lets you switch from Edit mode to Sculpt mode smoothly. This way, you can use special tools for advanced modeling.
Artists can add fine details and shape their models well. This makes Sculpt Mode key for 3D design.
Switching to Sculpt Mode
To get into Sculpt Mode, just pick it from the mode dropdown in the top-left corner. Once you're in, you can use many sculpting tools. These tools help you change the model's shape and details.
This mode is dynamic and easy to use. It helps make your model look better while staying simple to navigate.
Different Sculpting Brushes and Their Uses
Blender has many sculpting brushes for different tasks:
- Smooth Brush: Fixes problems and makes the mesh better after voxel remeshing.
- Inflate Brush: Moves vertices to add volume.
- Relax Topology: Makes the mesh even and well-structured.
- Sharpen Brush: Makes edges sharper and defines features, good for hard surface modeling.
- Enhance Details: Makes creases and valleys deeper, adding texture without extra polygons.
These brushes use special algorithms for different tasks. Knowing how to use them helps artists work better with complex shapes in Sculpt Mode.
Employing the Displace Modifier
The Displace Modifier in Blender is a cool way to change surface shapes using texture data. It makes models look more detailed without needing lots of mesh points. Knowing how to use it can really help artists.
What is the Displace Modifier?
The Displace Modifier moves vertices based on textures. This opens up many creative options. It works on three axes or follows vertex normals for more control.
Users can adjust how textures affect the mesh. This lets them get the look they want.
Applying Height Data for Realistic Textures
When using height data, the default displacement value is 1.0 (white). This is a starting point. The displacement strength can be changed by multiplying the displacement by a Strength value.
A Midlevel setting helps control the displacement. Vertex groups let you make changes to certain parts of the mesh.
| Feature | Description |
|---|---|
| Displacement Axes | X, Y, Z or vertex normals |
| Displacement Strength | Calculated with the formula: vertex_offset = displacement × Strength |
| Midlevel | Threshold for positive or negative displacement |
| Vertex Groups | Target specific vertices for displacement manipulation |
| Texture Options | Use image data and parametric textures for displacement control |
| Texture Coordinates | Derived from UV mapping, local coordinates, or another object's system |
| Color Channel Usage | Select which channel (R, G, B, A) influences displacement |
Using these Blender tools can make your 3D models look amazing. Mastering the Displace Modifier can really make your work stand out.
Creating and Using Texture Maps
Texture maps are key to making 3D models look better in Blender. Knowing how to make and use them is important for artists. They help make models look real. This part will show you how to use texture maps in Blender and how to make your own.
Understanding Texture Maps in Blender
Texture maps are images that make 3D models look real. In Blender, UV mapping helps you place these images on your model's faces. If you don't do UV unwrapping right, the texture might look wrong.
Blender has tools to help with UV coordinates. These are important for good texture mapping. When you put a texture on your mesh without a material, it looks gray or black. So, setting up materials is key to seeing your texture maps.
Steps to Create Your Texture Map
- First, pick your object in Blender and go into Edit Mode.
- Use UV Unwrap to make UV coordinates for your mesh. This tells how your texture maps will look.
- Open the UV Editor to see your UV layout. Here, you can adjust it to fit your texture image.
- In the shader editor, make a new material and add an Image Texture node. Connect it to your UV output. Then, load your texture map.
- Change your viewport shading to Textured to see changes as you adjust your UV layout.
- If needed, try different projection methods like Flat, Box, or Sphere to fit your object.
- Lastly, save your texture maps as separate files or pack them into your Blender project for easy management.
Getting Your Part Ready for Texturing
Preparing for texturing in Blender needs careful attention to make sure your mesh is ready. A clean, well-structured mesh is key before adding a displacement map. Problems like overlapping faces, non-manifold edges, and extra vertices can mess up your textures.
Using the right techniques and tools can make texturing better.
Preparing the Mesh for Displacement
Before starting the texturing, focus on these Blender tips:
- Check for overlapping faces to avoid visual problems in your textures.
- Look for non-manifold edges, as they can mess up UV mapping.
- Get rid of extra vertices that add complexity without adding to the look, keeping your mesh simple.
Good mesh preparation helps avoid texture stretching. This makes UV unwrapping more effective. A well-made UV map can improve texture quality, cutting down stretching issues by up to 50%.
Tri-planar projection is a great way to fix UV distortions.
| Mesh Issue | Impact on Texturing | Solution |
|---|---|---|
| Overlapping Faces | Leads to visual artifacts | Remove duplicates and merge vertices |
| Non-Manifold Edges | Causes UV mapping errors | Identify and fix edges using mesh analysis |
| Unnecessary Vertices | Increases complexity and poly count | Use decimation or manual vertex removal |
Working on these points in the prep phase boosts your mesh's efficiency and looks. Evenly spreading out polygons can greatly improve performance and texture fit.
Applying the Displacement Map Effectively
Using a displacement map can make your 3D models in Blender look better. It's important to adjust settings in the Displace Modifier. This helps textures show up on your mesh's surface.
Getting the settings right is key for realistic looks and fine details.
Adjusting Settings for Optimal Results
When you use displacement maps, tweaking 'Strength' and 'Midlevel' in the Displace Modifier is crucial. 'Strength' makes the displacement more visible. 'Midlevel' changes where the displacements start.
Finding the right mix makes textures look real without messing up the model's shape. Some users say using a multires modifier can take a long time. It might take over 60 minutes, depending on the model's complexity.
Also, high-resolution displacement uses a lot of CPU and GPU power. So, watch your system's resources.
Fine-Tuning Your Model
For the best results, use high baking resolutions. Higher resolutions mean more detail and better feature retention. Some users suggest a workflow with the multires modifier set to 6 for all levels before baking.
This helps avoid grey displacement maps from level mismatches. Using Blender techniques like geometry nodes and setting subdivision levels right can make your model look more realistic.
Cleaning Up Overlapping Faces
Keeping your 3D models clean is key for a nice look. Overlapping faces can mess up your model's look and work. Blender edit mode has great cleanup techniques to fix this. Using these methods makes your models better and easier to make.
Best Practices for Edit Mode Cleanup
When dealing with overlapping faces, aim to make your mesh better without losing details. The "Limited Dissolve" tool is great for this. It makes faces and edges simpler based on a set angle. This keeps your model looking good without losing important details.
The "Collapse Edges & Faces" tool is also helpful. It combines small edge and face areas into one vertex. This keeps your textures and UVs safe, keeping your model looking right.
Using "Edge Loop" deletion makes your surface smooth. This is better than just deleting edges, which can make holes. "Delete Vertices" might make gaps, but "Collapse Vertices" keeps your model's look without messing with UVs.
"Dissolve Vertices" gets rid of vertices by merging faces into one edge. This makes your model's surface better. "Dissolve Faces" is good for joining face areas together, making your model simpler.
In some cases, you might need "Tear Boundaries." This lets you control how faces dissolve. Knowing these tools helps you fix overlapping faces right.
Good topology is important for looks and smooth animations. Learning cleanup techniques in Blender makes modeling easier. For more info, check out the official guide here.
Conclusion
Adding topology in Blender to flat faces is a detailed process. It makes 3D models better. You start with a plane and use sculpting tools, texture maps, and modifiers.
Each step is important for a good workflow. Learning these techniques makes your work better. It also makes your final 3D models look great.
Auto-retopology tools like Quad Remesher by Exoside or Voxel Remesh are key. They cut down polygon count and make meshes better. This is crucial for animation or game engines.
Knowing how to use these tools changes how you make 3D assets. You can make detailed, high-quality models. Skills in sculpting and mesh optimization are very useful in Blender.
FAQ
What is topology in 3D modeling?
Topology is about how vertices, edges, and faces are arranged in a 3D model. It's key for mesh quality. It also affects how a model looks when it's sculpted or animated.
Why is good topology important?
Good topology means smoother surfaces and better animations. This leads to professional-looking results. It also stops rendering problems and odd shapes, like when using Modifiers like Subdivision Surface.
How do I start using Blender for topology addition?
First, download and install Blender. Make sure your computer meets the needed specs. Then, set up your workspace to see the 3D viewport clearly. Make sure panels like the Outliner and Properties are easy to find.
What is the process to create a plane in Blender?
To make a plane, go to the 3D viewport. Press Shift + A to open the Add menu. Choose Mesh > Plane. Then, enter Edit mode and subdivide the plane for more detail.
How do I switch to Sculpt Mode in Blender?
To get to Sculpt Mode, pick the mode from the dropdown menu in the top-left corner. Make sure you have your object selected first.
What does the Displace Modifier do in Blender?
The Displace Modifier lets you use textures to change the mesh's shape. This adds depth and detail without making the mesh denser.
Why is UV mapping important in Blender?
UV mapping makes sure textures fit right with the model's geometry. It's key for realistic surface details and visual quality.
How do I prepare my mesh for applying texture maps?
Make sure your mesh is clean and well-organized. Check for overlapping faces, non-manifold edges, and extra vertices. A clean mesh is essential for good texture application.
What settings should I adjust when applying a displacement map?
When using a displacement map, tweak the Strength and Midlevel in the Displace Modifier. This controls how the texture changes the model's surface. It helps get the right elevation and detail.
How can I clean up overlapping faces in Blender?
In Edit mode, pick overlapping faces and use Limited Dissolve to clean them up. Regular cleaning boosts performance and model quality.
