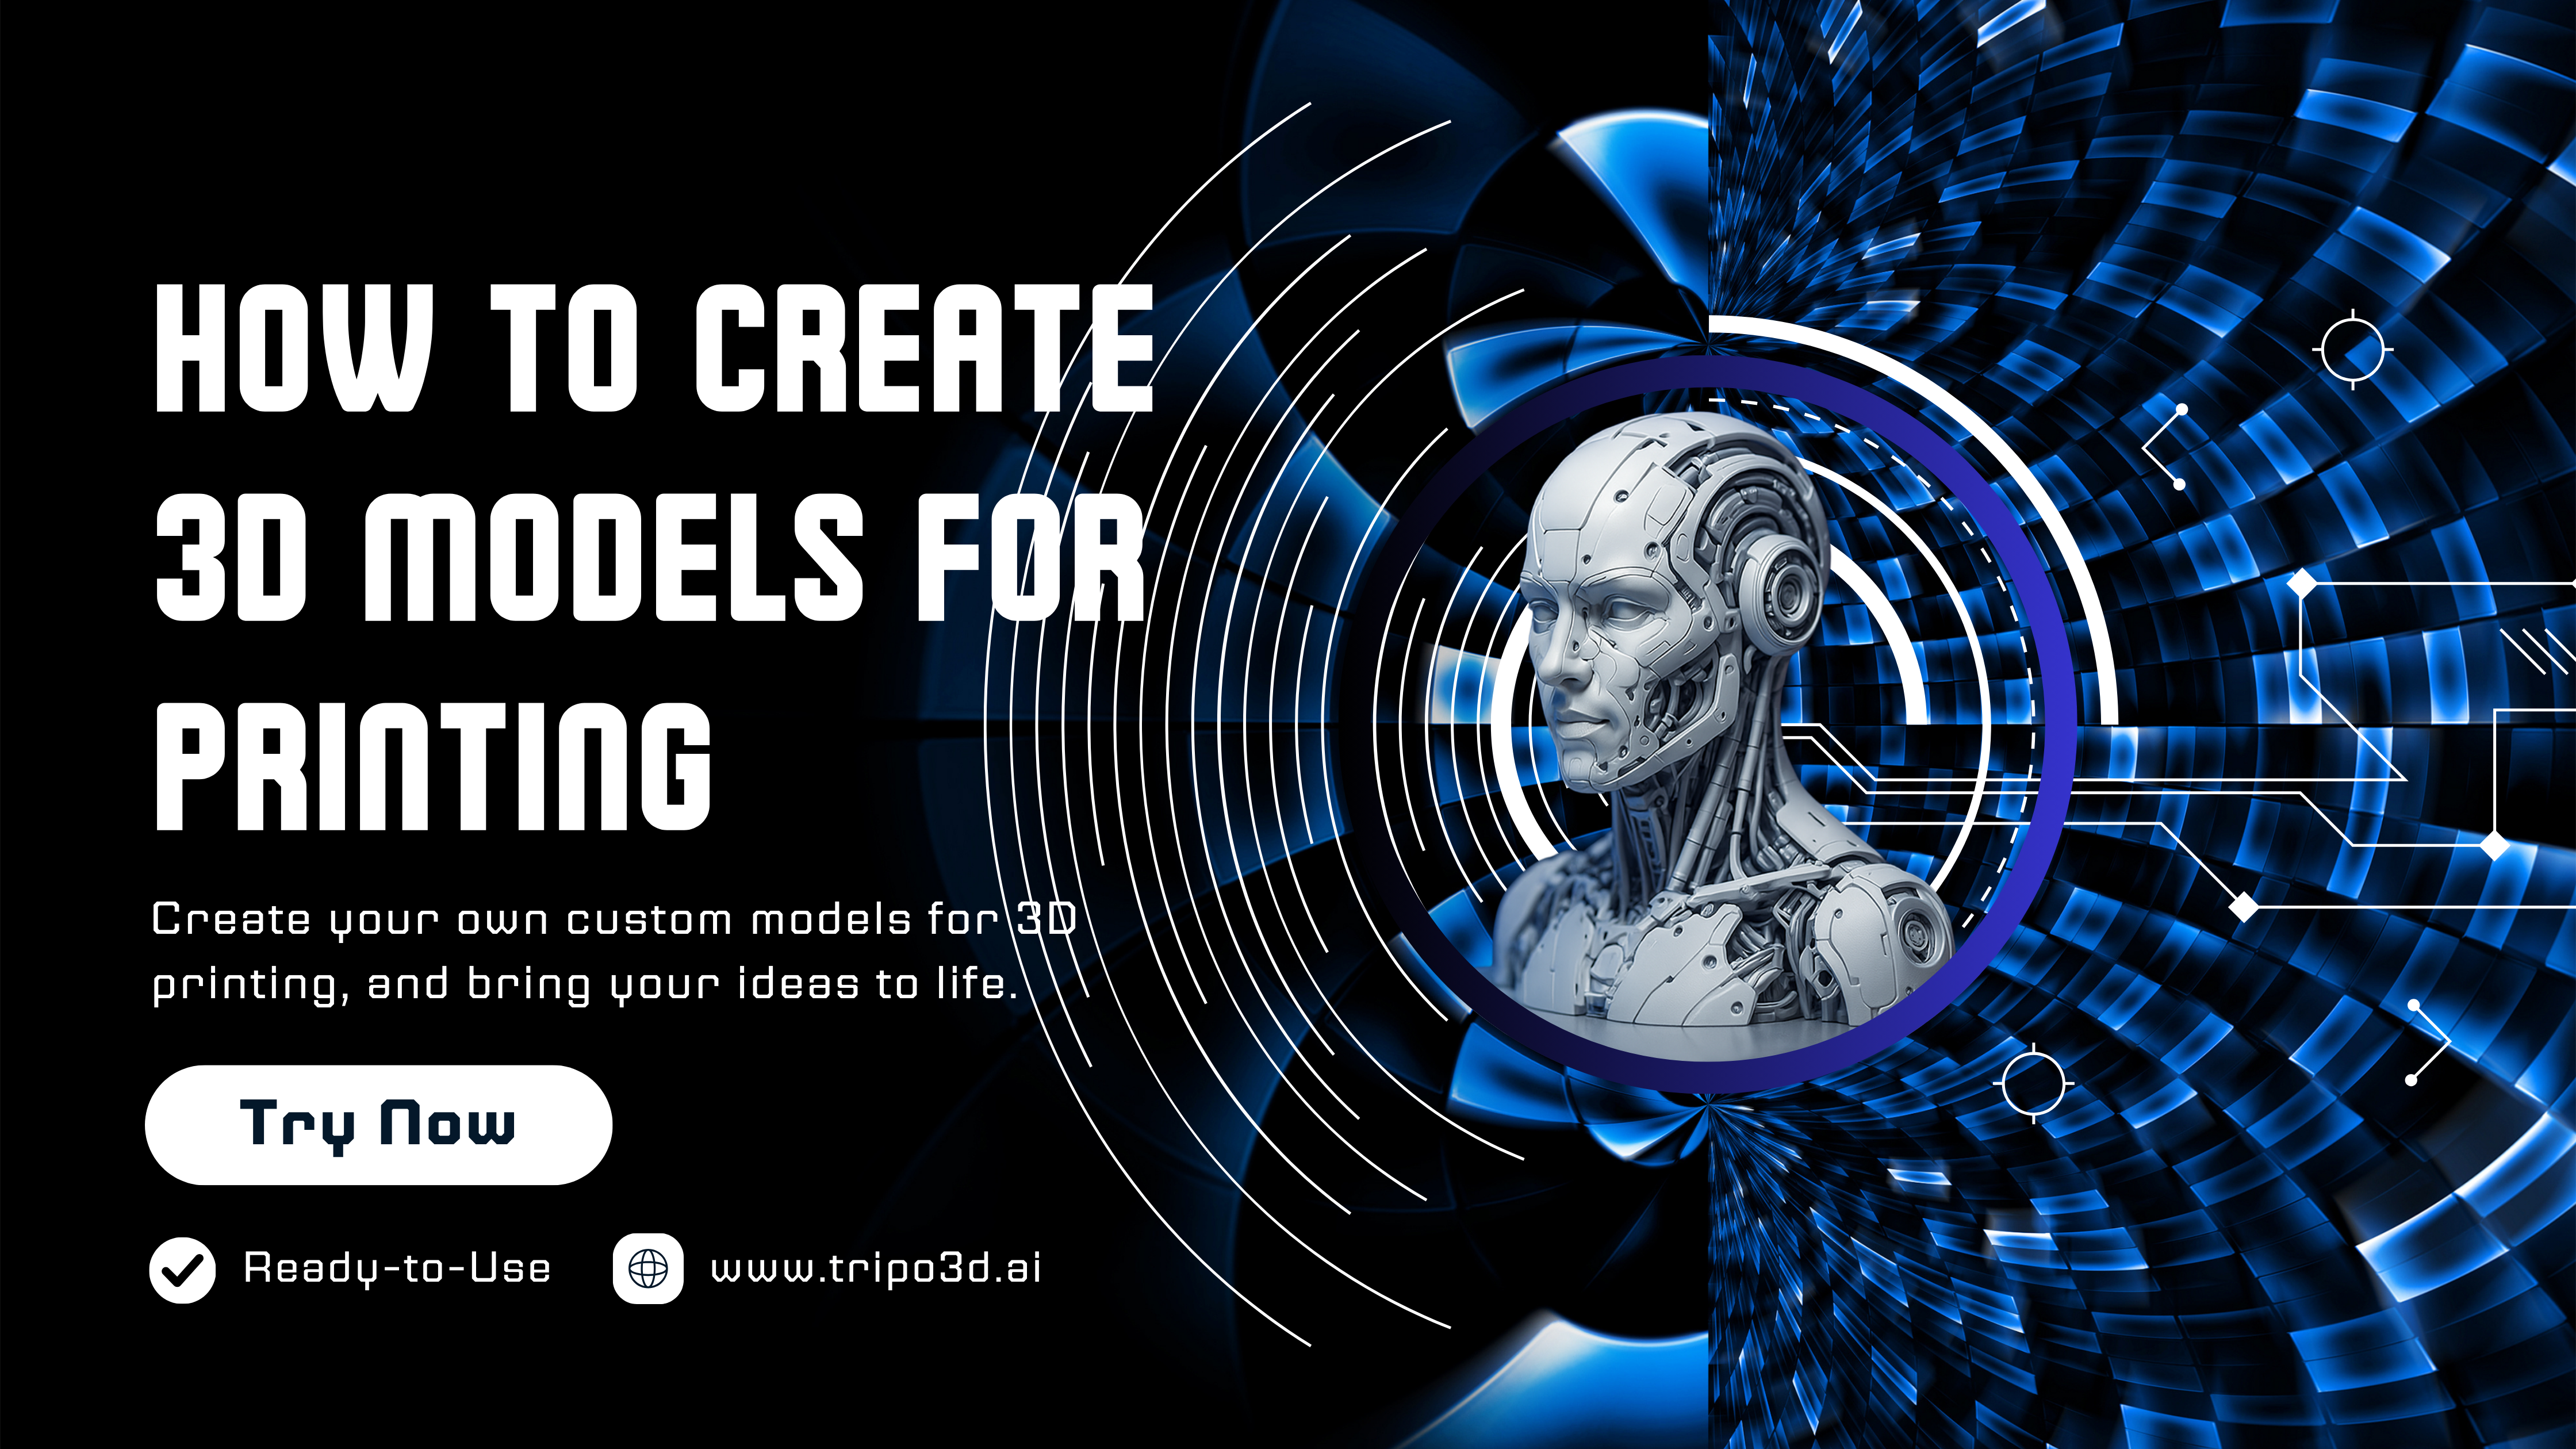
How to Create 3D Models for Printing In 2025: A Complete Guide
For many beginners and even professionals, understanding precisely how to create 3D models for printing can feel daunting. You struggle with complicated software, worry about printability issues like weak supports, distorted scaling, or losing detail—all common stumbling blocks.
But here's great news: creating 3D prints doesn't have to be complicated. This practical guide walks you step-by-step through the entire process, from generating your 3D model using powerful AI tools like Tripo AI, optimizing it in programs like Fusion 360 and Cura, and finally printing with professional quality results. Ready to confidently convert your creative visions into perfect 3D prints? Let's dive in.
Why Creating 3D Models for Printing Matters
3D printing is exploding across many industries—from gaming and hobbies to prototyping product designs and even medical applications. Knowing how to effectively design 3D prints places creativity directly in your hands. Sustainable prototyping, personalized creations, and custom tools are all at your fingertips when you master this core skill.
Whether you're a hobbyist discovering how to design 3D prints for the first time, an engineer utilizing FreeCAD parametric workflow, or an artist seeking creative freedom, 3D model creation for printing is essential.
How to Create 3D Models for Printing: Step-by-Step Guide
- Let's explore this clearly, starting with your model's initial creation and finishing with solid, high-quality prints.
Step 1: Set Up a Free Tripo AI Account
Visit Tripo AI Website, create a free account for immediate access. Zero costs, straightforward registration.
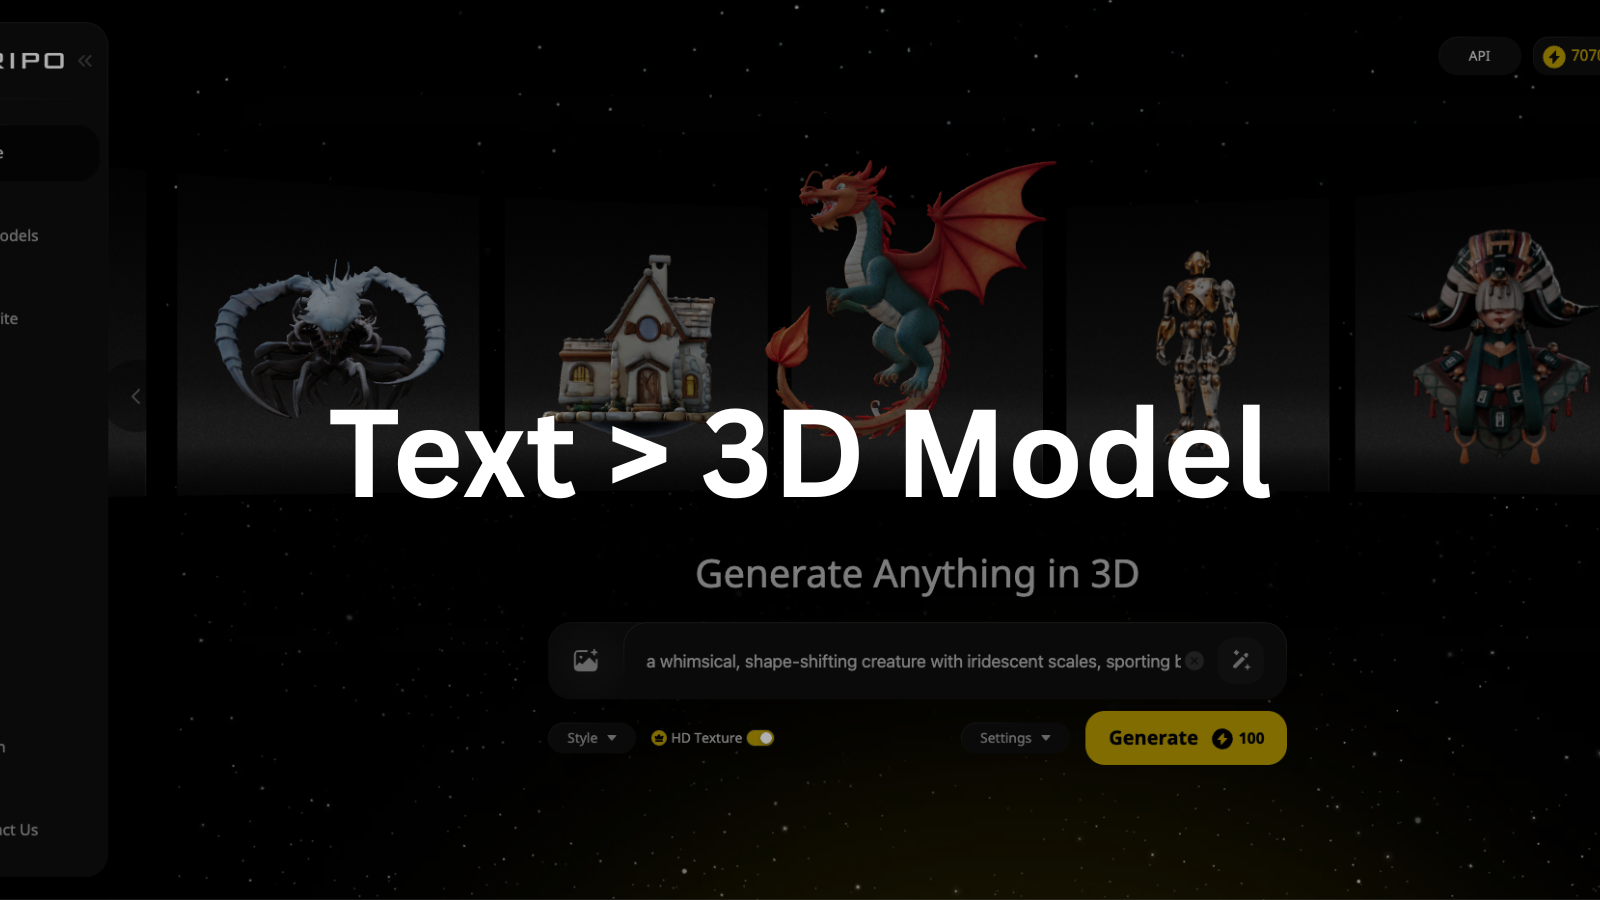
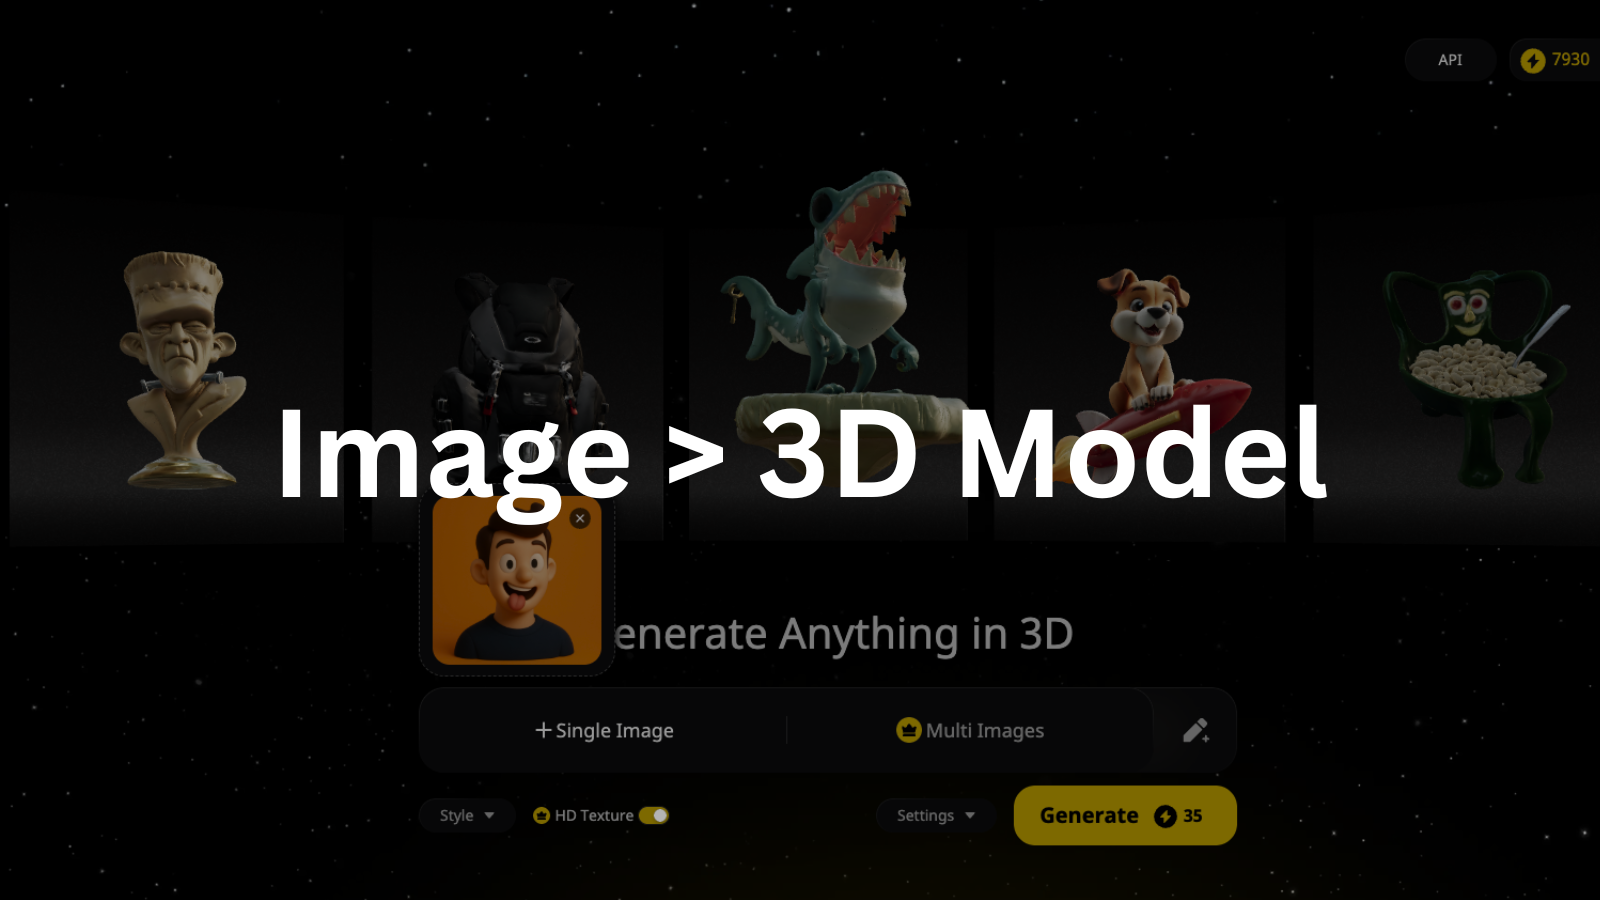
Step 2: Choose Your Generation Method
Tripo AI provides two entry points based on your preference:
- Text-to-3D Generation: Just input a clear description (prompt). For the best results:
- Use clear, detailed prompts (specific materials, shapes, or textures.)
- Enhance your prompt using Tripo's built-in prompt enhancement tool.
- Add a negative prompt to exclude unwanted features.
- Enable HD Texture Mode from settings for crisper results.
- For those new to prompt engineering, here's a valuable resource on Mastering Prompt Engineering. You can also access this free prompt creation tool to simplify writing your description.
- Image-to-3D Generation: Alternatively, upload clear image references. Tripo quickly analyzes the images and generates 3D models instantly.
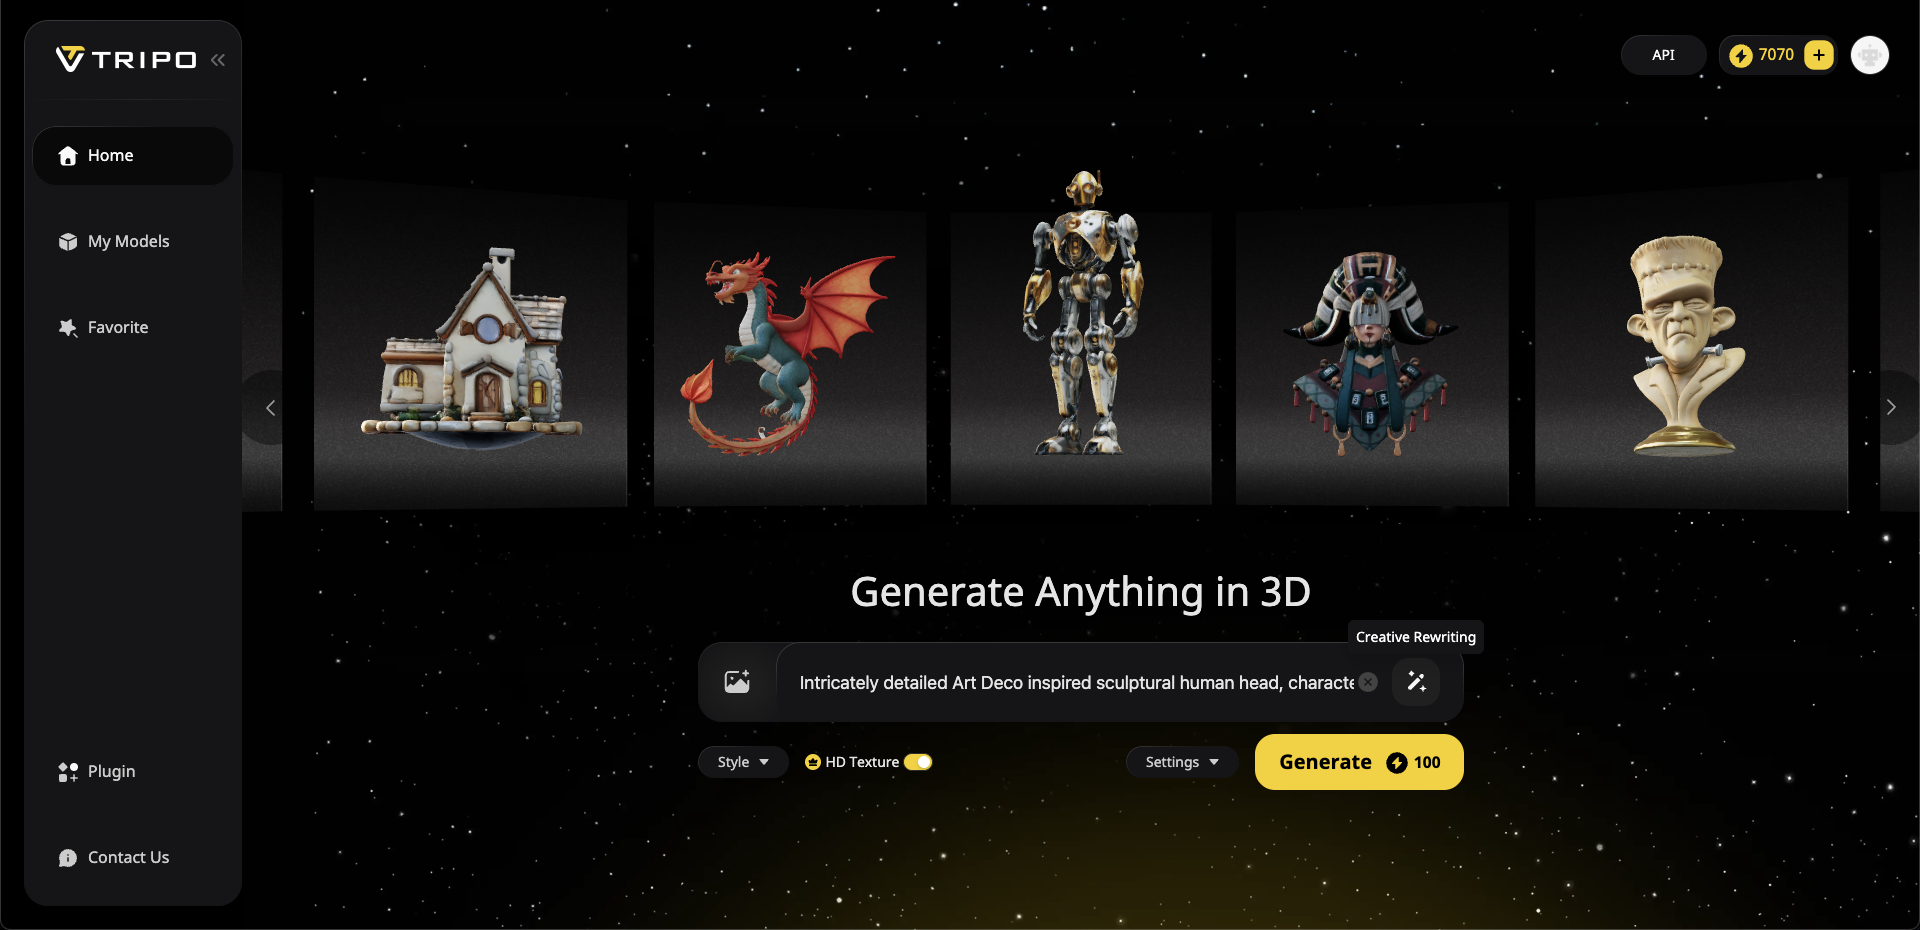
Since our goal here is to make a crisp, professional-quality 3D print from a textual description, navigate the Tripo AI interface and select the "Text-to-3D" option.
Selecting "Text-to-3D" is ideal because it allows anyone, regardless of their 3D skill level, to precisely define what they want using simple, plain language prompts. No artistic or technical 3D modeling knowledge is required—just imagine clearly and describe it.
Make sure that:
- "HD Texture Mode" is activated for maximum high-definition detail.
- Confirm your choice and proceed confidently to the next easy, yet crucial step: clearly prompting your object.
Step 3: Generate Your 3D Model from Your Text Prompt (Detailing the Actual Creation)
Now it's time to dial in precisely what you wish to create as your 3D print design.
Here's how you'll structure your detailed prompt within the intuitive Tripo AI prompt window.
Tripo AI provides a built-in "Prompt Enhancer" directly beside the text-entry window. Tap this if you'd like an instant refinement of your prompt, making your descriptions neat and clearly structured.
Also, ensure to fill the "Negative Prompt" from the settings menu to exclude unwanted features explicitly.
Example model: Cybernetic Fusion: Intricately Detailed Sci-Fi Android Head 3D Model
Example prompt: "Intricately detailed Art Deco inspired sculptural human head, characterized by a prominent S-shaped central division and layered circular relief patterns. Composed of segmented panels: one half featuring fine, dark, linear engraved textures; the other side with smooth, matte silver metallic surfaces and embedded dark mesh-like textured areas. Stylized almond-shaped eyes. The neck is an elongated cylindrical base with vertical grooves. Primary materials are brushed silver metal and dark matte metallic accents. High-fidelity model, sharp details, cinematic quality.
(negative: organic, flesh, hair, cartoon, overly glossy, wires, cables, separate pieces, blurry, deformed)"
Once your prompt is precisely described:
- Click the "Generate" button clearly visible in the interface.
- Within mere seconds, Tripo AI rapidly develops and delivers four beautifully detailed preview models ready for evaluation.
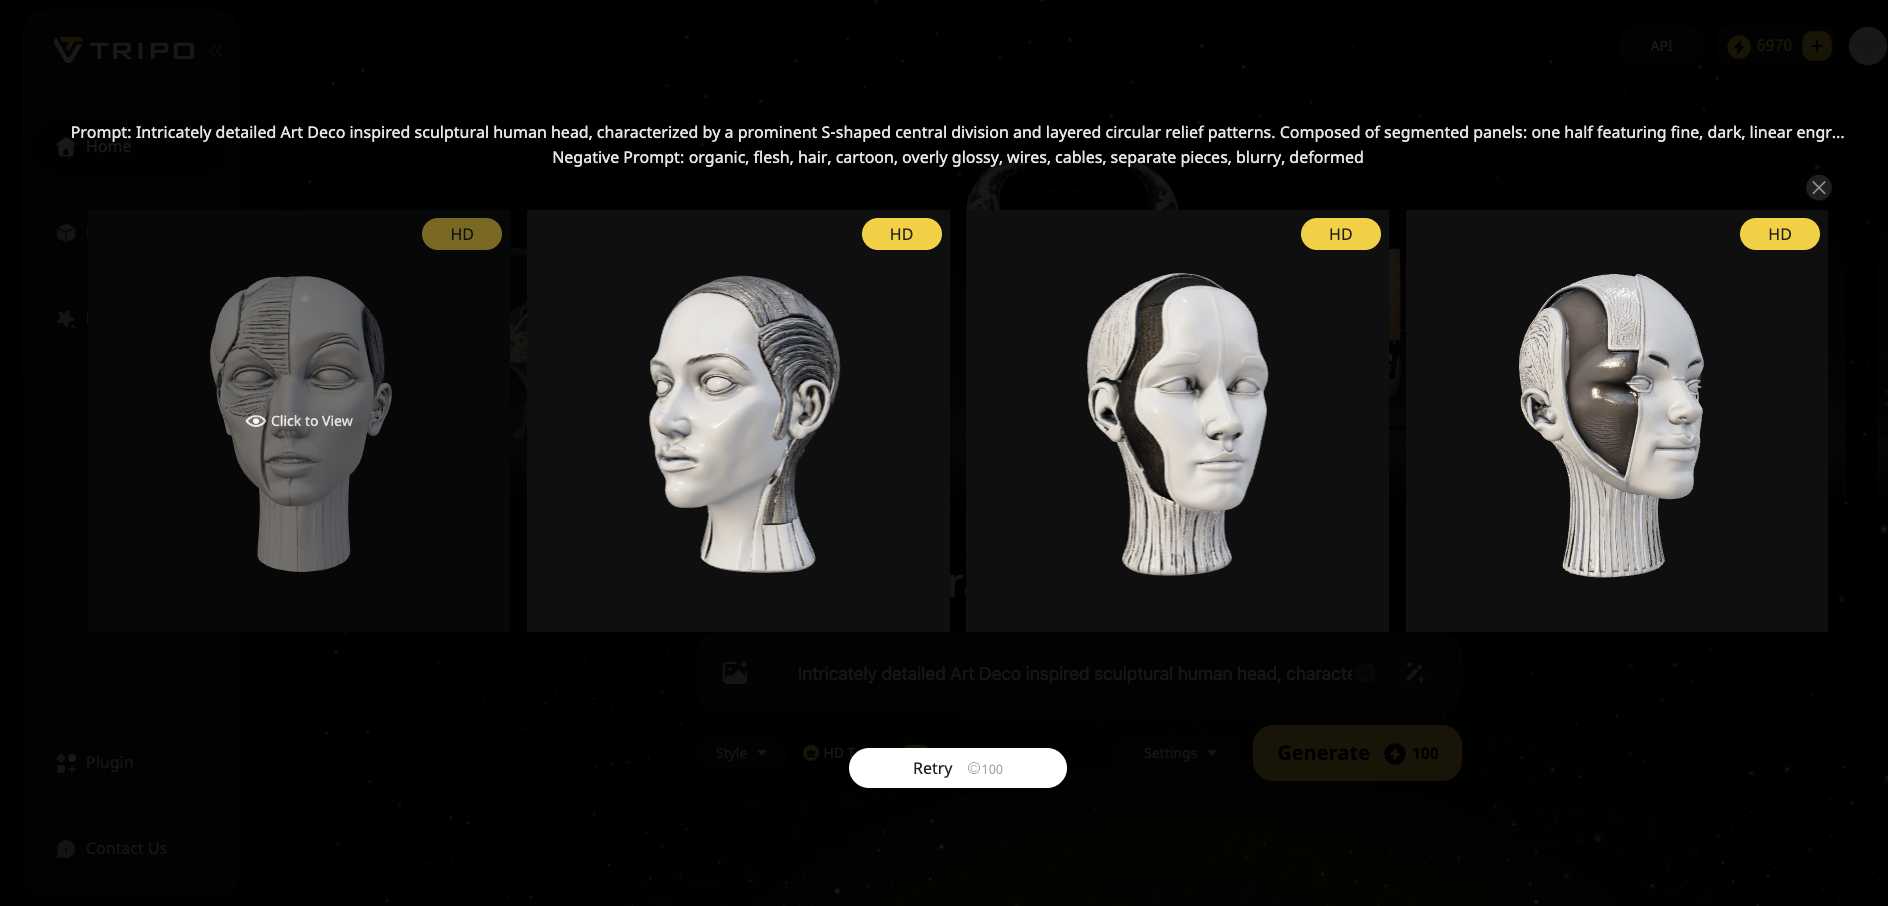
- Carefully review and select the most satisfying version.
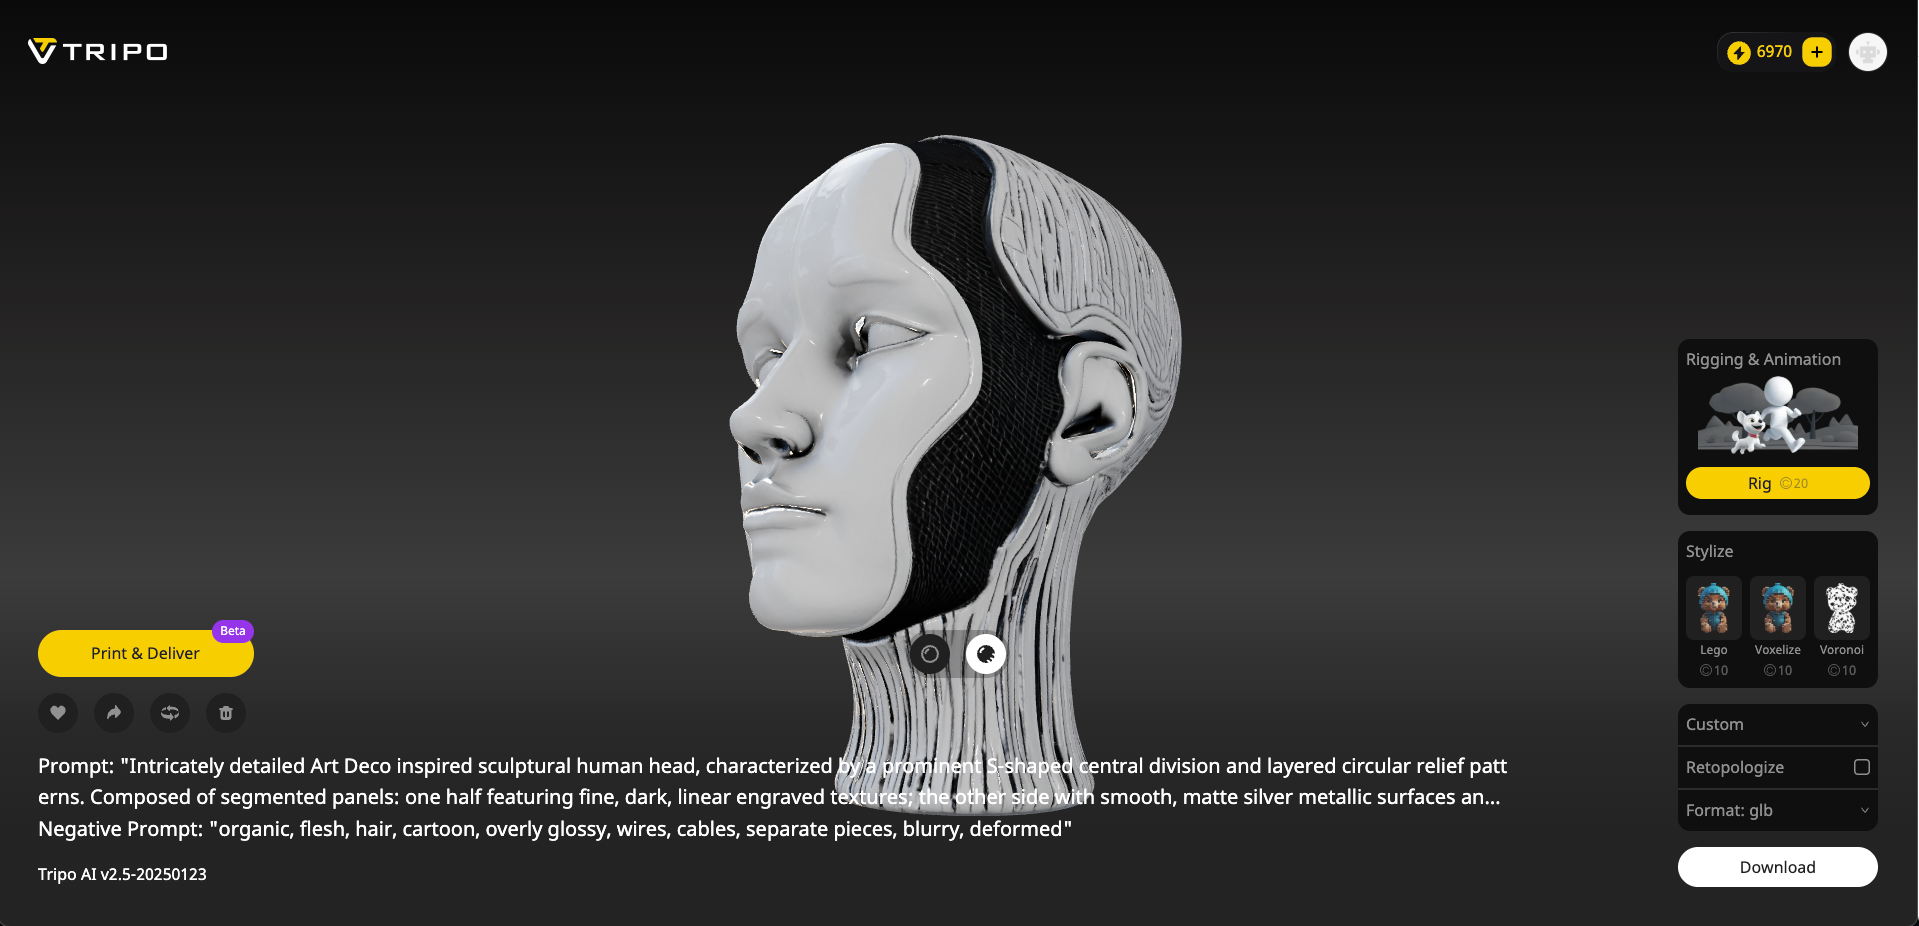
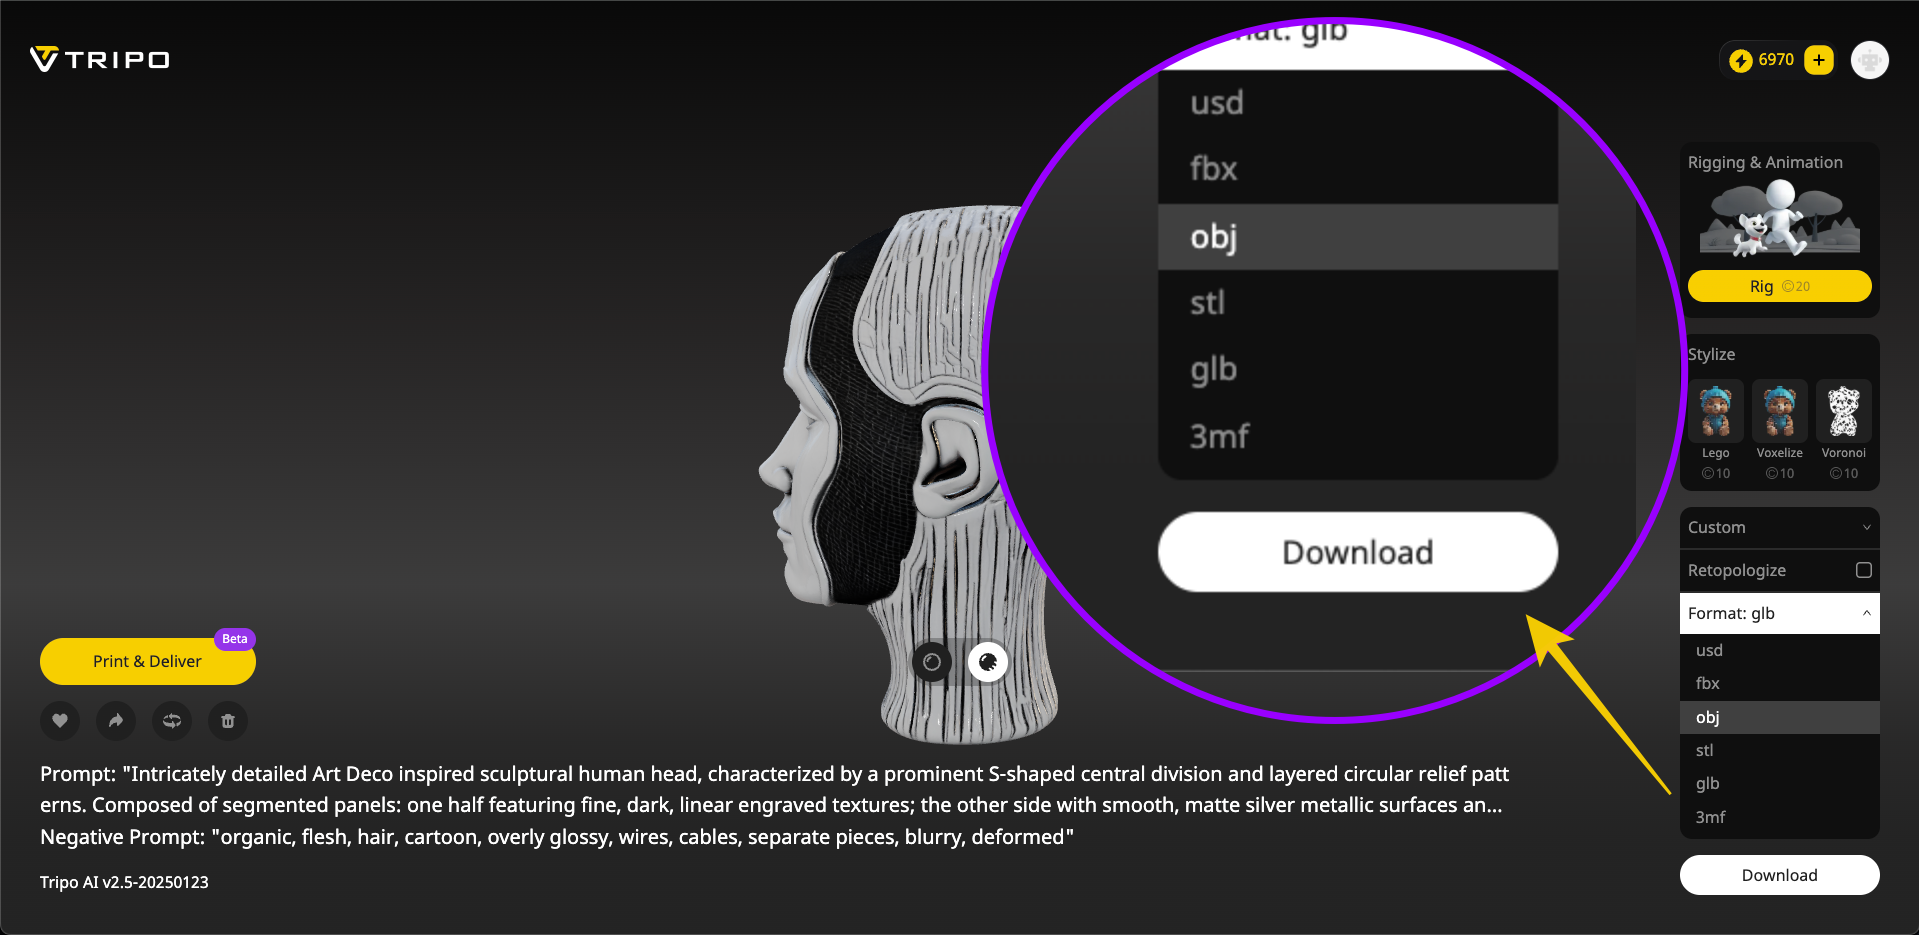
- Quickly proceed to download your preferred model file in universally accepted formats like OBJ for the next stages of printing preparation.
Prefer an Instant 3D-Printed Version? Order Directly from Tripo Shop!
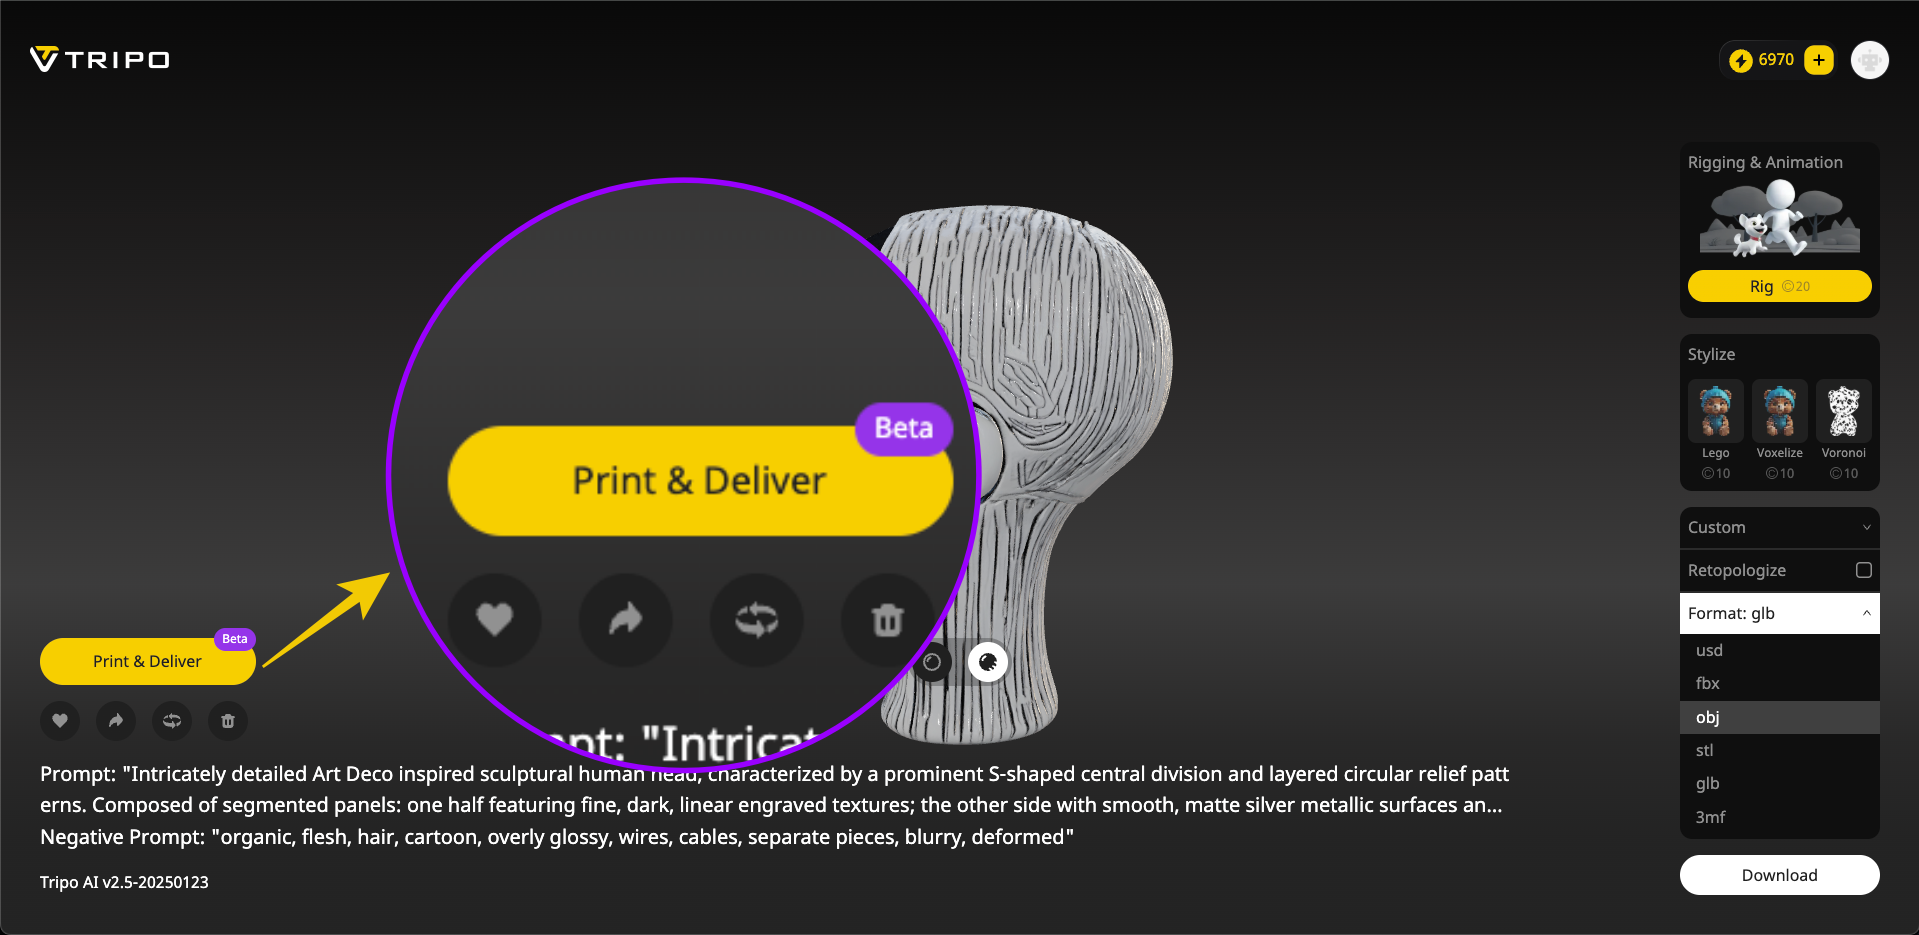
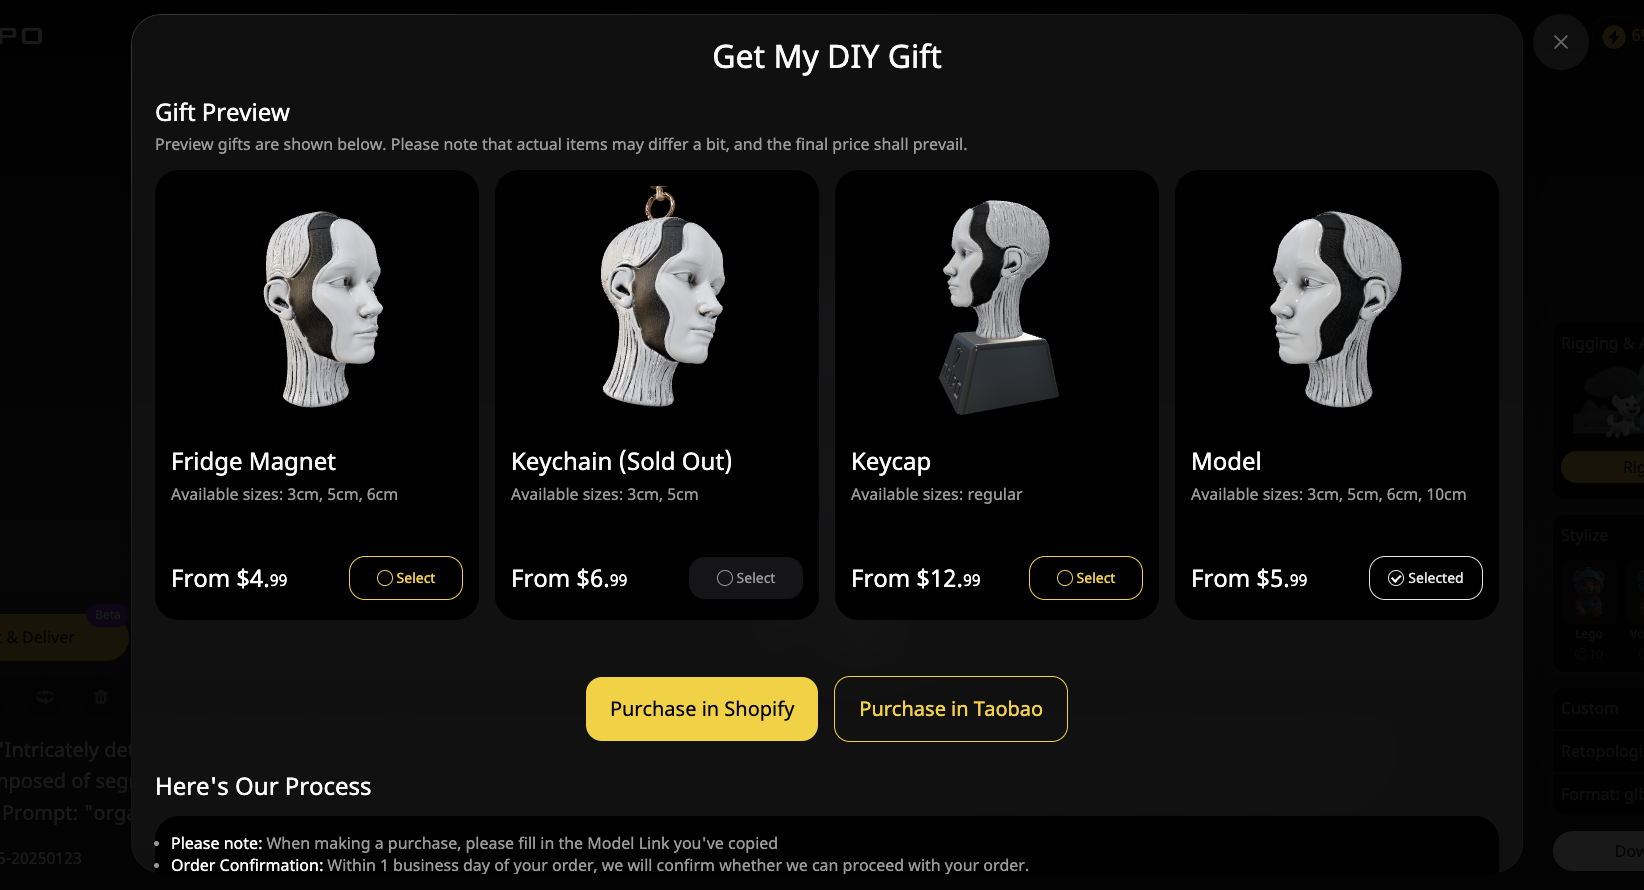
Simply select your desired form and size, preview the final product clearly illustrated by Tripo, and quickly order directly through Shopify or Taobao with just a single click. Tripo Shop handles all the heavy lifting—from professional 3D printing and packaging to secure, prompt delivery straight to your door.
This streamlined option is perfect if you seek maximum convenience or if you don't yet own your own 3D printing equipment. Your customized ideas come directly to life with minimal effort.
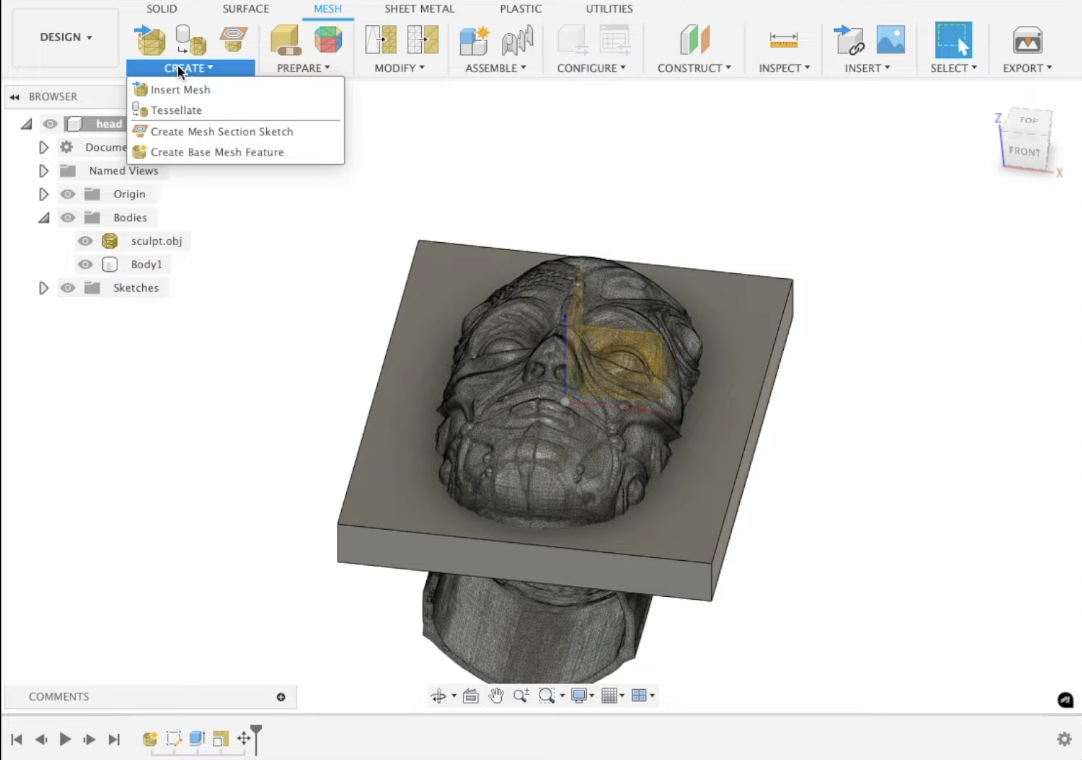
Step 3: Optimize Your Model Using Fusion 360 for 3D Printing
AI-generated models aren't always perfectly print-ready straight out of the gate. Often, you'll want slight adjustments to ensure the highest print quality and simplicity.
Personally, I love Fusion 360 for 3D printing optimization tasks, given its powerful features.
Step 4: Repair and Close the STL Mesh
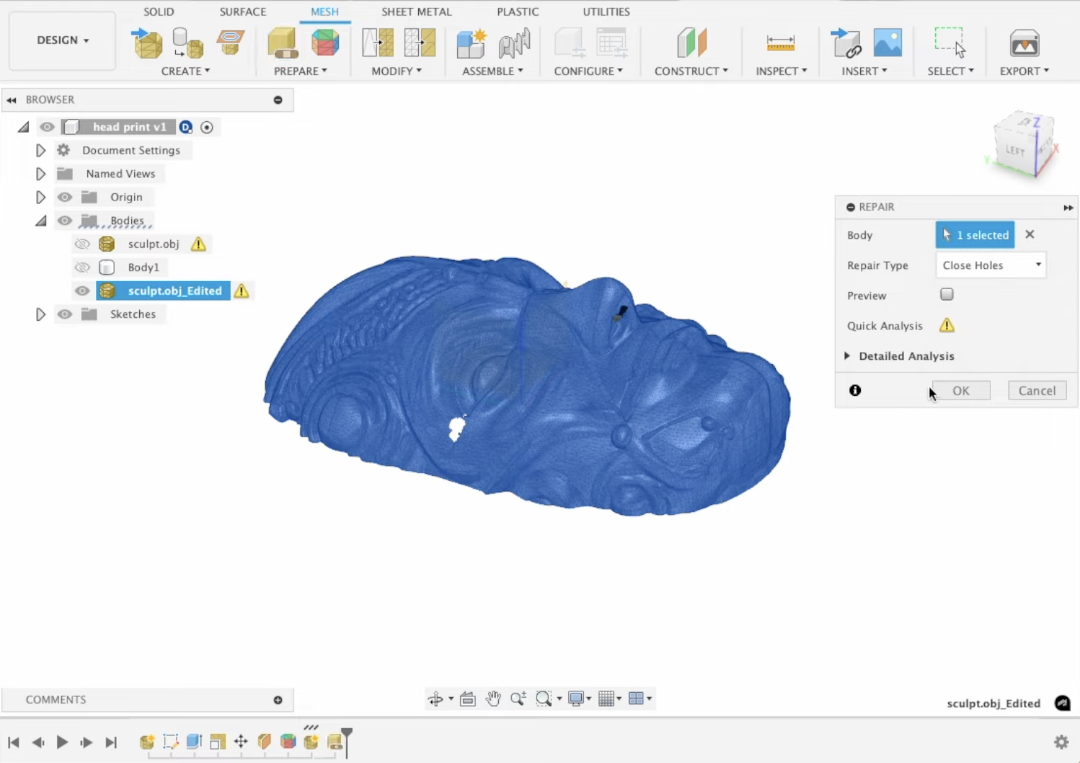
When working with models, sometimes you run into mesh integrity issues when exporting, requiring you to repair STL file for 3D printing.
- Quick fixes in Fusion 360 include:
- Use Fusion's built-in Repair function on the Mesh tab to close minor holes automatically.
- Check mesh integrity visually; ensure no faces intersect or overlap, and there aren't any non-manifold edges (edges connecting more than two faces).
- Export your maker-ready model as an STL for slicing software.
- For more advanced mesh repair tasks, Meshlab or alternative mesh-editing software can also be utilized effectively.
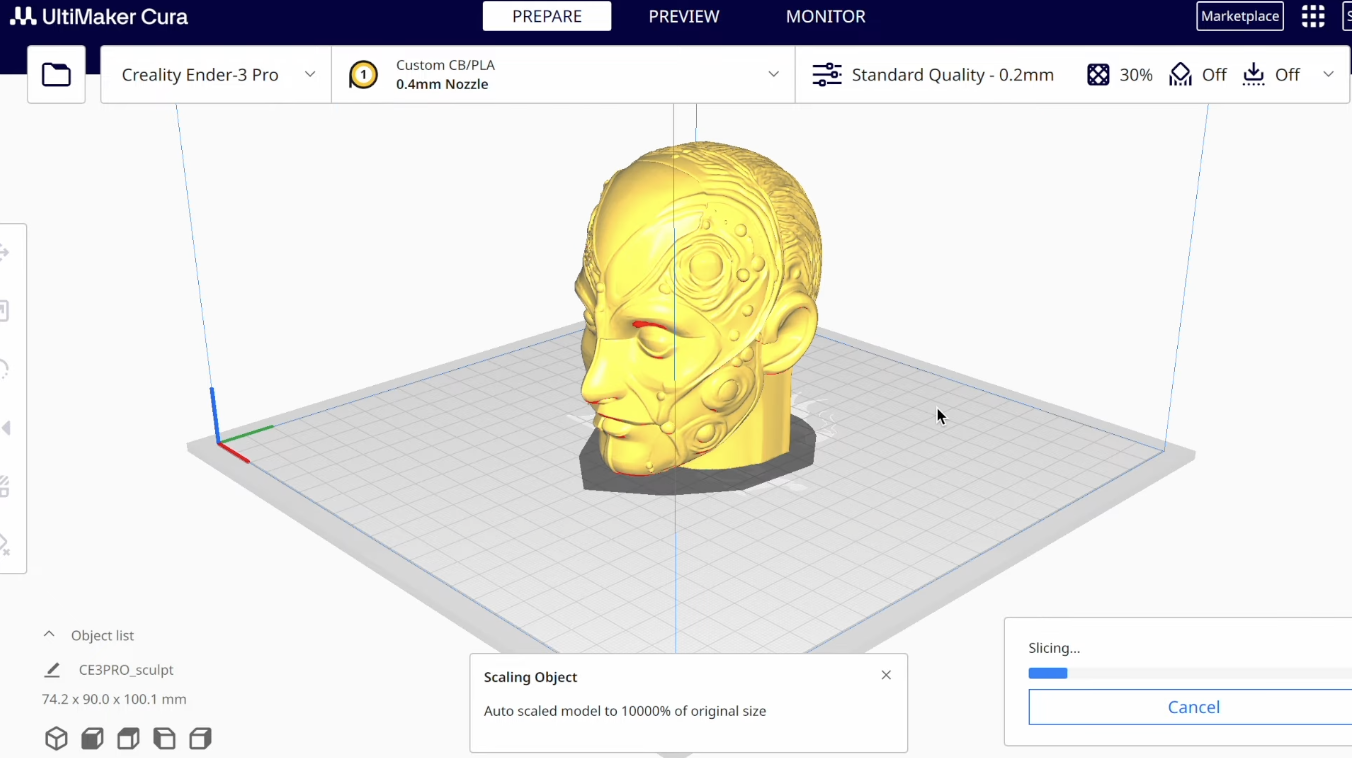
Step 5: Slicing in Cura to Prepare Your Print
Now that our model is optimized, import the STL into your slicer for final preparations. Cura is an excellent user-friendly slicer option.
- Here are key points for success in Cura:
- Scaling: Adjust and scale 3D model without distortion using Cura's uniform scale feature.
- Orientation: Carefully rotate to orient a model for minimum supports, significantly cutting both material usage and print time.
- Supports: Add supports in Cura only where needed to comfortably accommodate overhang angles exceeding 45 degrees.
- Set print settings: Select appropriate layer-height, infill %, and speed profiles suitable for your material and detail requirement.
- Preview the slicing result to verify everything looks perfect.
Step 6: Finalize Your Print and Watch It Come Alive
It's finally time to send your optimized design to the printer!
Step 7: Post-Processing and Finishing Touches (Optional)
- Your model's printed—congrats! Some simple post-processing can dramatically enhance finish quality:
- Carefully remove supports using pliers or cutters.
- Sand excess roughness or layer lines where necessary.
- Optional painting: prime surfaces, apply acrylic paint layers for vibrant, colorful results, then seal with protective coating if needed.
Essential Tips for Beginners
- Just starting out? Keep these beginner-friendly tips in mind:
- Consider a Tinkercad beginner guide if learning Fusion or FreeCAD feels intimidating initially.
- Always double-check model dimensions and scaling before printing.
- Take advantage of Tripo Shop's 3D printing services before investing heavily in printer equipment yourself.
Advanced Workflow Improvements
- Already savvy with creating 3D models for printing? Boost your efficiency with these advanced methods:
- Explore the automation and precision of a FreeCAD parametric workflow for accurate iterative design.
- Customize slicer profiles in Cura or PrusaSlicer for faster printing and reduced filament usage over time.
- Regularly test new AI modeling prompts on Tripo AI to discover uniquely detailed and customized print outputs.
Conclusion: Start Creating Stunning 3D Models Today!
- Initially skeptical myself about AI-generated 3D models, I rapidly found Tripo AI's quality exceeded my expectations. Harnessing powerful AI tools alongside practical optimization techniques outlined above makes 3D modeling accessible regardless of prior experiences.
- Understanding precisely how to create 3D models for printing offers unrivaled creative freedom. Start now—let your imagination run wild, and experience the satisfaction of bringing your designs to life, one layer at a time.
- Excited to try? Head to Tripo AI—now it's your turn to transform ideas into stunning, tangible realities!
- Would you rather skip DIY printing? Remember: Tripo Shop offers easy professional printing so you can effortlessly receive your custom 3D printed models without lifting a finger.
- What incredible models will you create next? Share your ideas below!
